It's Surprisingly Easy—and Worth It—to Make Ricotta At Home
Welcome to Cheese Week, The Takeout's weeklong praise of cheeses.
A lot of my journey here at the The Takeout has involved making things from scratch that turn out superior to store-bought versions. Foods like pie crust. Pizza. Cookies. Made with love in my small, cramped kitchen, these projects offered me the chance to doctor some food items up the way I like, with techniques that I was able to master eventually (sometimes after a few tries, but still). Bring it on! What's next?
Then for Cheese Week, I was tasked with making ricotta cheese. This seemed a bit out of my purview, more like the hobby of some commune-dwelling hippie using milk from her pet cow. So I turned to some chefs to give me the best way to go about this.
Luckily, Cesar Sarmiento, chef de cuisine of Cucina Enoteca in Southern California (a series of California-Italian inspired restaurants), graciously forwarded me his ricotta recipe. His instructions were exacting, and a little intimidating, even though he called it a "super easy recipe, and great home project to wow friends and family!" That is true, I can't imagine the reaction I would get if I announced at book club or something that I had made the cheese.

Homemade ricotta
- 4 cups milk
- 2 cups heavy cream
- 1 cup buttermilk
- 2-3 tsp. kosher salt (depending on brand)
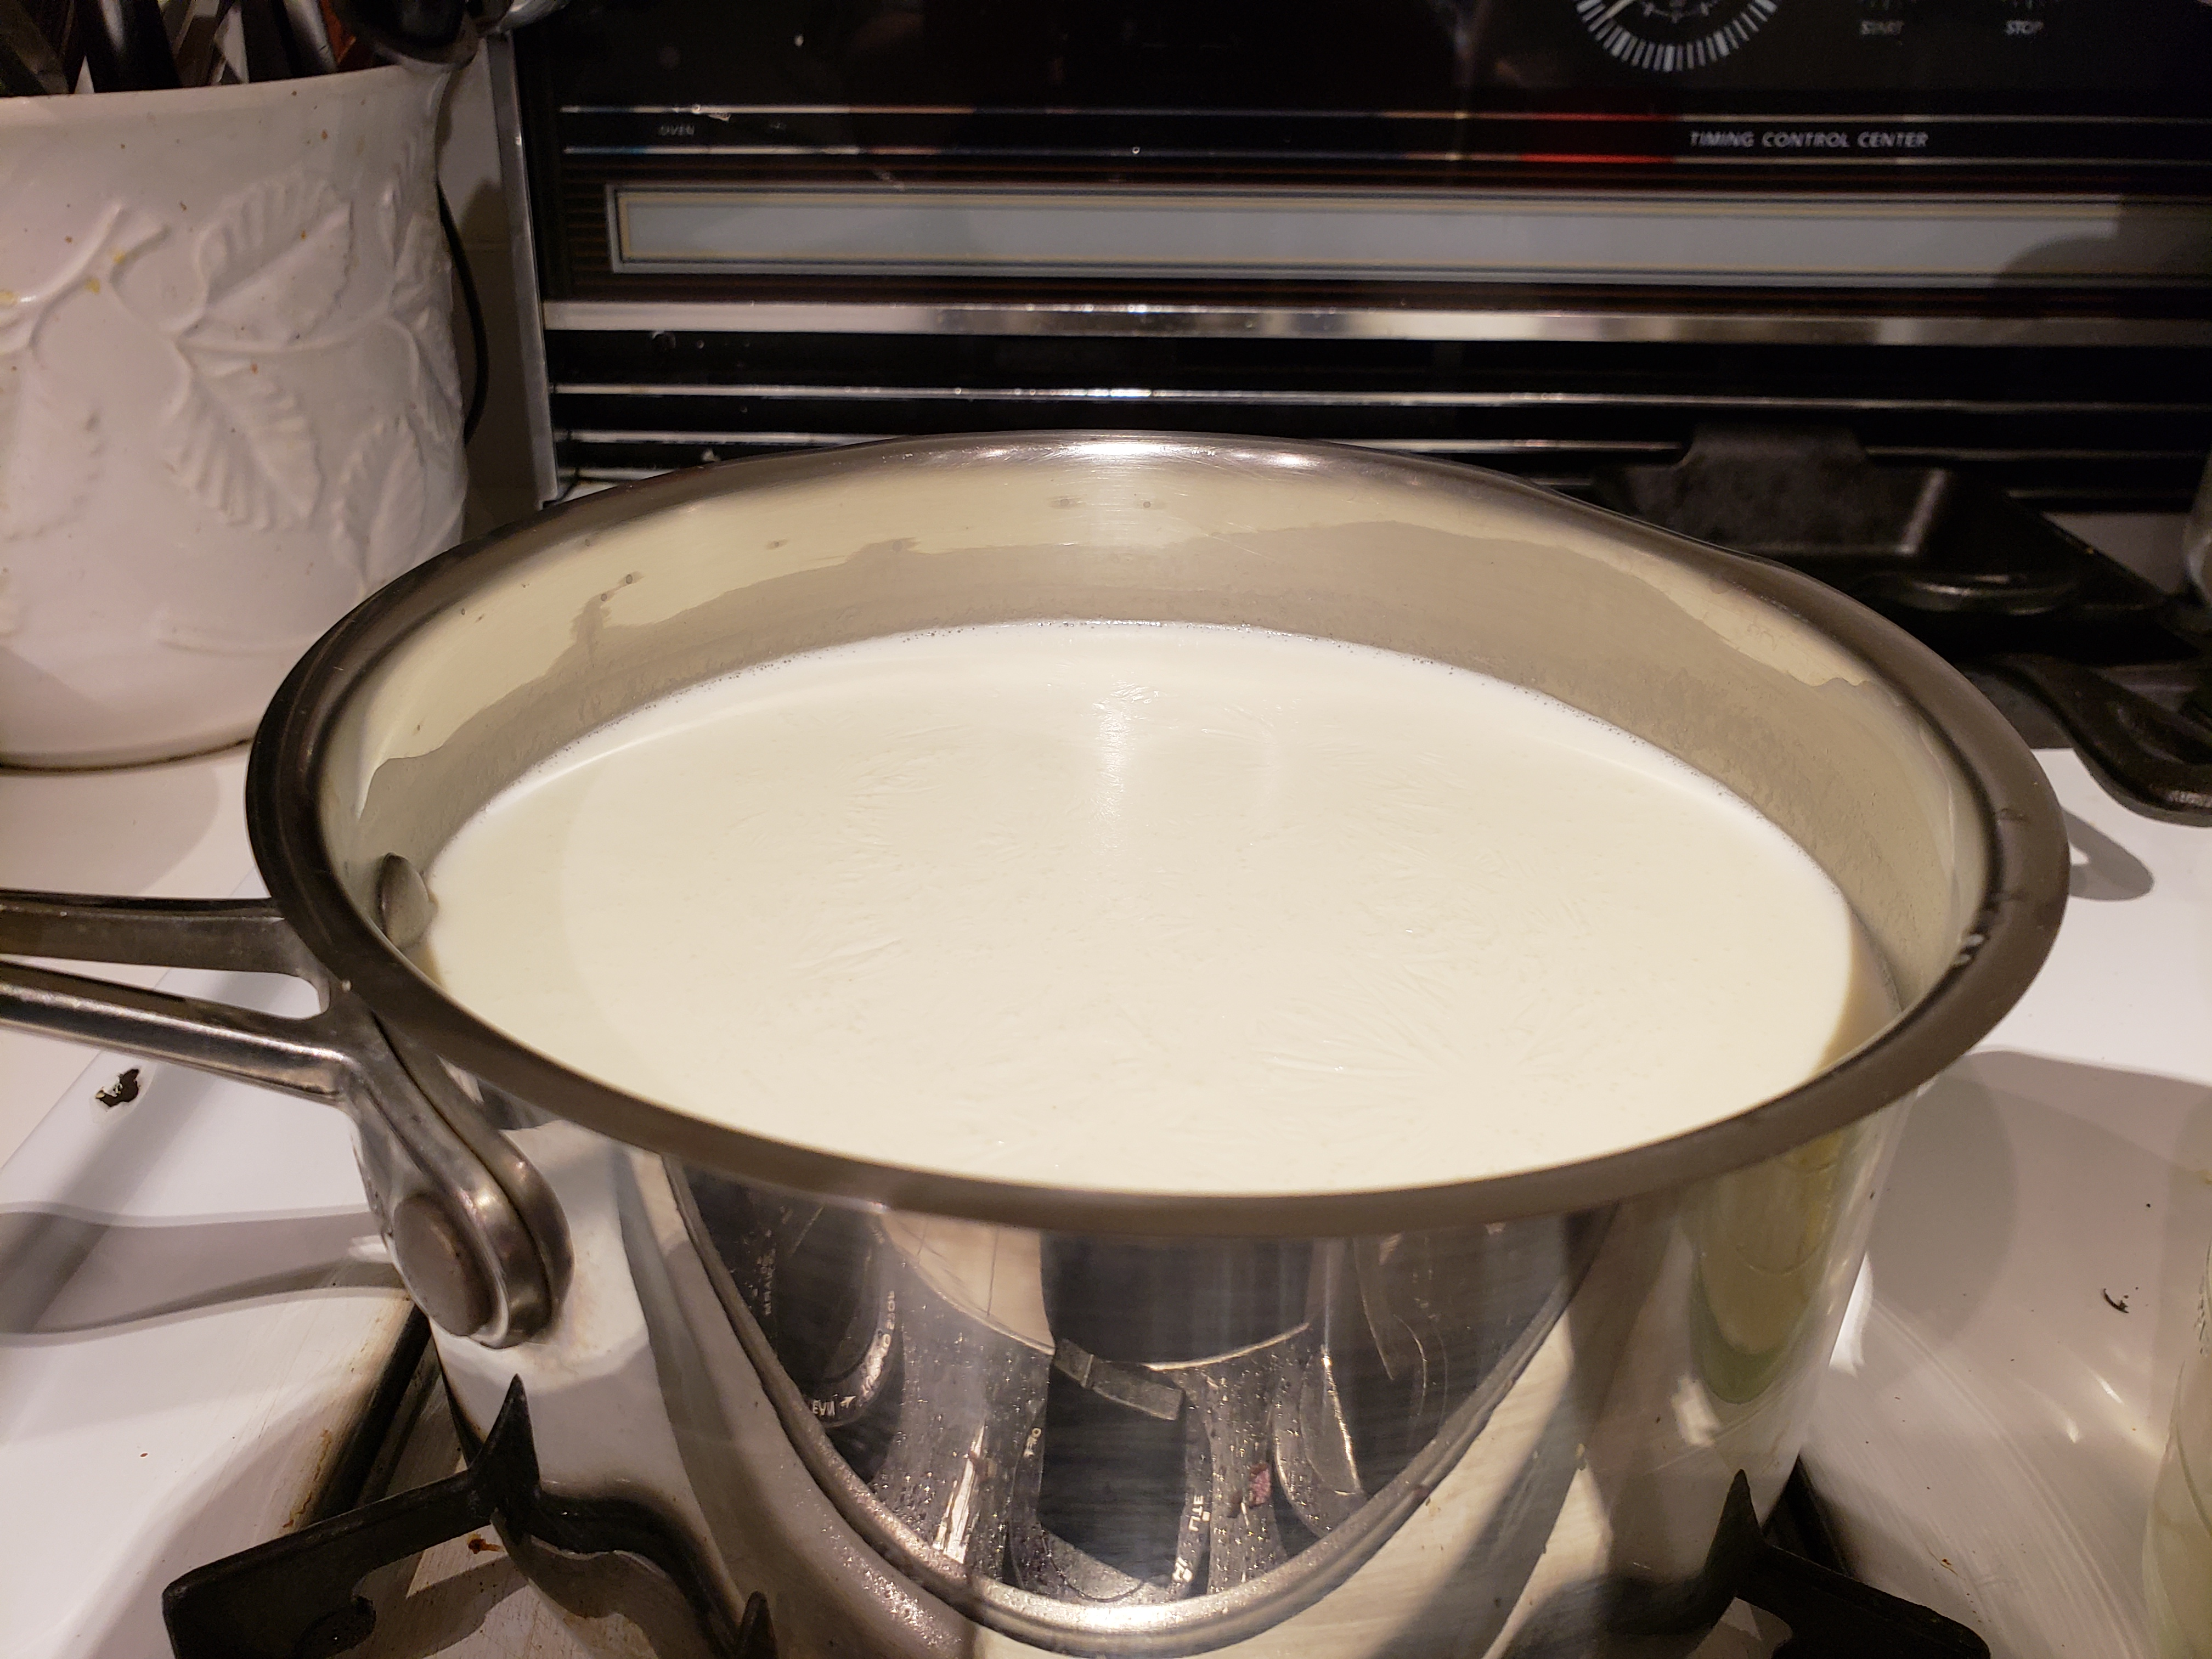
Mix together the first three ingredients (no salt yet) in a pot, and heat over low heat. Stir and scrape bottom of pan (using a soft spatula) for first 5 minutes to keep the buttermilk integrated.
When liquid starts to curdle, keep the temperature at around 200-210 degrees Fahrenheit, for 30 minutes. Never (ever) boil, it will break up the curds and you'll never gain consistency, and will have to start anew, and will have wasted a lot of milk and cream.
Once you see consistent curdling and whey collecting on top, remove from heat and cover with a lid for another 30 minutes.
Pour into cheesecloth and drain over a mixing bowl, keeping the liquid for later.How long you decide to drain the liquid depends on the consistency you're looking for. Draining should always be a minimum of an hour. For wetter, more creamy style, 3-4 hours is sufficient. For a drier, more chalky consistency, drain overnight.
Once you've determined desired consistency, add the salt and mix. Use the leftover liquid to mix back in if you're trying to adjust or add moisture.
Executive chef Patrick Money of the forthcoming Cesarina restaurant in San Diego had a slightly different method, using lemon juice for the reactive acid for the necessary curdling instead of buttermilk. He then instructed, "Bring the dairy to a boil and then add the lemon juice and salt. Stir to combine then remove from heat and let sit—it will start to form little cheese curds that we then separate from the liquid. Put these curds into a cheesecloth to drain to make your ricotta."
Still, even with Sarmiento's recipe, the words "easy for him to say" came to mind. I stared at my pot of dairy products like a madwoman, terrified that his boiling warning would come to fruition and that I would have to "start anew," with a limited supply of dairy at my disposal. Also, did you know that curdling and boiling resemble each other at times? When my pot offered a big "bloop" sound and a bubble, I was horrified, even though the thermometer only read 200 degrees. But eventually, my patience/anxiety was rewarded, and things definitely got curdly. I removed the pot from heat; then my husband made an impressive draining cheesecloth contraption out of our paper towel dispenser, and our cheesemaking process was underway in earnest.

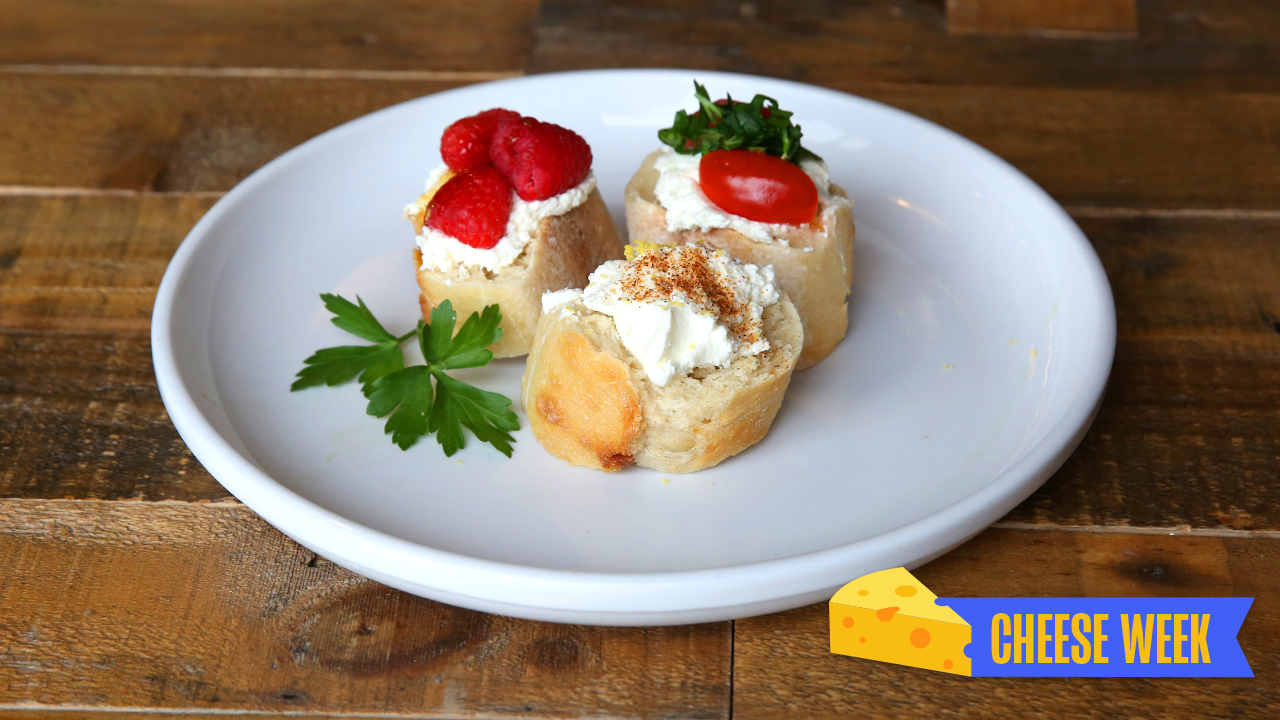
I let it drain overnight, as it still seemed pretty squishy, but when it was done, I did not see the chalky substance that Sarmiento was talking about. My morning cheese was nothing but creamy and delicious, a whole new level up from cottage-cheese-like store-bought brands. Where usually I just put ricotta in pasta dishes, this one I wanted to enjoy on crusty bread with some grape tomatoes and herbs, or in a bowl with berries and honey. Its possibilities seemed limitless, stretching far past lasagna, my typical ricotta application.
Sarmiento agreed, "Best thing about this recipe is both the ability to adjust consistency and its application for both savory or sweet preparations. A drizzle of good olive oil and a few sprinkles from your spice rack can do most of the work: fennel pollen, chili powder, etc. Lemon or orange zest, chopped herbs, pesto, really functional. For breakfast, you can throw a dollop onto scrambled eggs or fold into an omelette." I brought it to work, and all of my fellow tasters were in love with it, on crusty bread with grape tomatoes and herbs, raspberries and honey, or even just spices and lemon zest.
I am on record as a huge fan of cream and cream-related products, and this ricotta offered a fairly easy, delectable application of heavy cream and buttermilk. I'm so pleased with this first batch of ricotta, I'm sure I will try this experiment again to pull off an impressive appetizer for my next dinner party or potluck, clutching my thermometer and watching for curdling with a careful eye. After all, I now have cheesecloth at the ready, even if I don't have my own cow.