This Bang-For-Your-Buck Vegetarian Dinner Is Three Recipes In One
Guys... I think I may have created the most quarantiniest of all quarantine recipes. It has everything—I mean everything—you could possibly ask for:
- It's one of those all-day "learn something new" cooking projects that keep everyone entertained and/or distracted, but there's not too much hands-on time; ergo, there's fewer ways for anyone to screw it up.
- Even if you screw it up, it'll still taste really good! (Probably!)
- IT! HAS! BEANS!
- You don't need to get too precious with the measurements, and in some places, you won't be able to. (This is a very exciting recipe!) If you're a person who is comfortable in the kitchen, consider them guidelines. Follow your gut. These are beans that will lead to all sorts of personal discovery.
- It involves an Instant Pot!
- It also involves a specialized item called a "nut milk bag," which is a mesh bag used for making (you guessed it) nut milks and homemade cheeses. Even if you don't use it all that often, every time you open a drawer and see your nut milk bag you will giggle for a solid ten seconds.
- It's a zero-waste dish where we quite literally milk these ingredients for all they're worth. Because you're not just making some beans and ricotta. Oh no, my friends. This meal has bonus meals and bonus projects and bonus fun. This is a recipe with sidequests and brand-new adventures.
- One of those extra adventures is bread! And the other one is cheese!
- It pretty much guarantees leftovers, which you can eat with your bonus bread and cheese, and this whole shebang costs like $15 tops.
- You can be flexible with the vegetables you use, because who the hell knows what you're going to find in the supermarket on any given day. Use what you've got and have fun with all of this. Nobody should be stressed out by any of part of this recipe, because we all have enough to deal with already.
This is not just a recipe, but a journey. It requires actual reading, not just skimming, because it's filled with exciting twists and turns. First, you turn a gallon of milk and fresh lemon juice into ricotta in an Instant Pot; then, you pressure-cook a pound of dried beans in the generous amount of leftover whey. When you lift the lid, you'll have a pot of delicious beans and recooked curds to turn into your bonus cheese. (There's a great opportunity here for a "well, actually" comment about how true ricotta is made from the second cooking, and I'm just going to let you guys handle that one, because I have way too many exciting things to write about and just don't have the time for it right now.)
So now, you've got a lot of tasty cooked beans that are suspended in warm golden whey. You take a slotted spoon, put some on a plate with a nice schmear of that ricotta you had set aside to strain, saute some vegetables in garlic, chili, and the zest of that lemon you used to make the ricotta, throw it on top of the plate and—BOOM—dinner. You're welcome.
But wait... there's more? You bet your ass there's more.
You might wonder why you're cooking just a pound of beans in well over half a gallon of whey, and there's a reason for that! You ever notice how leftover bean soup, after it's been refrigerated for a while, kinda solidifies? Even once they're done cooking, beans can't stop their starchy selves from soaking up liquid. On day two, your leftover beans and whey will have done something very sexual with each other. It could be a soup. It could be a pasta sauce. It could be an incredibly fancy bean dip. It will be whatever it feels it was put on this earth to be, and you will enjoy it.
Oh, and that ricotta you set aside to strain while the beans were cooking? The whey that drains off of that gets mixed with some yeast, salt, and bread flour to become overnight no-knead bread yes that just happened.
Buckle up, kids.

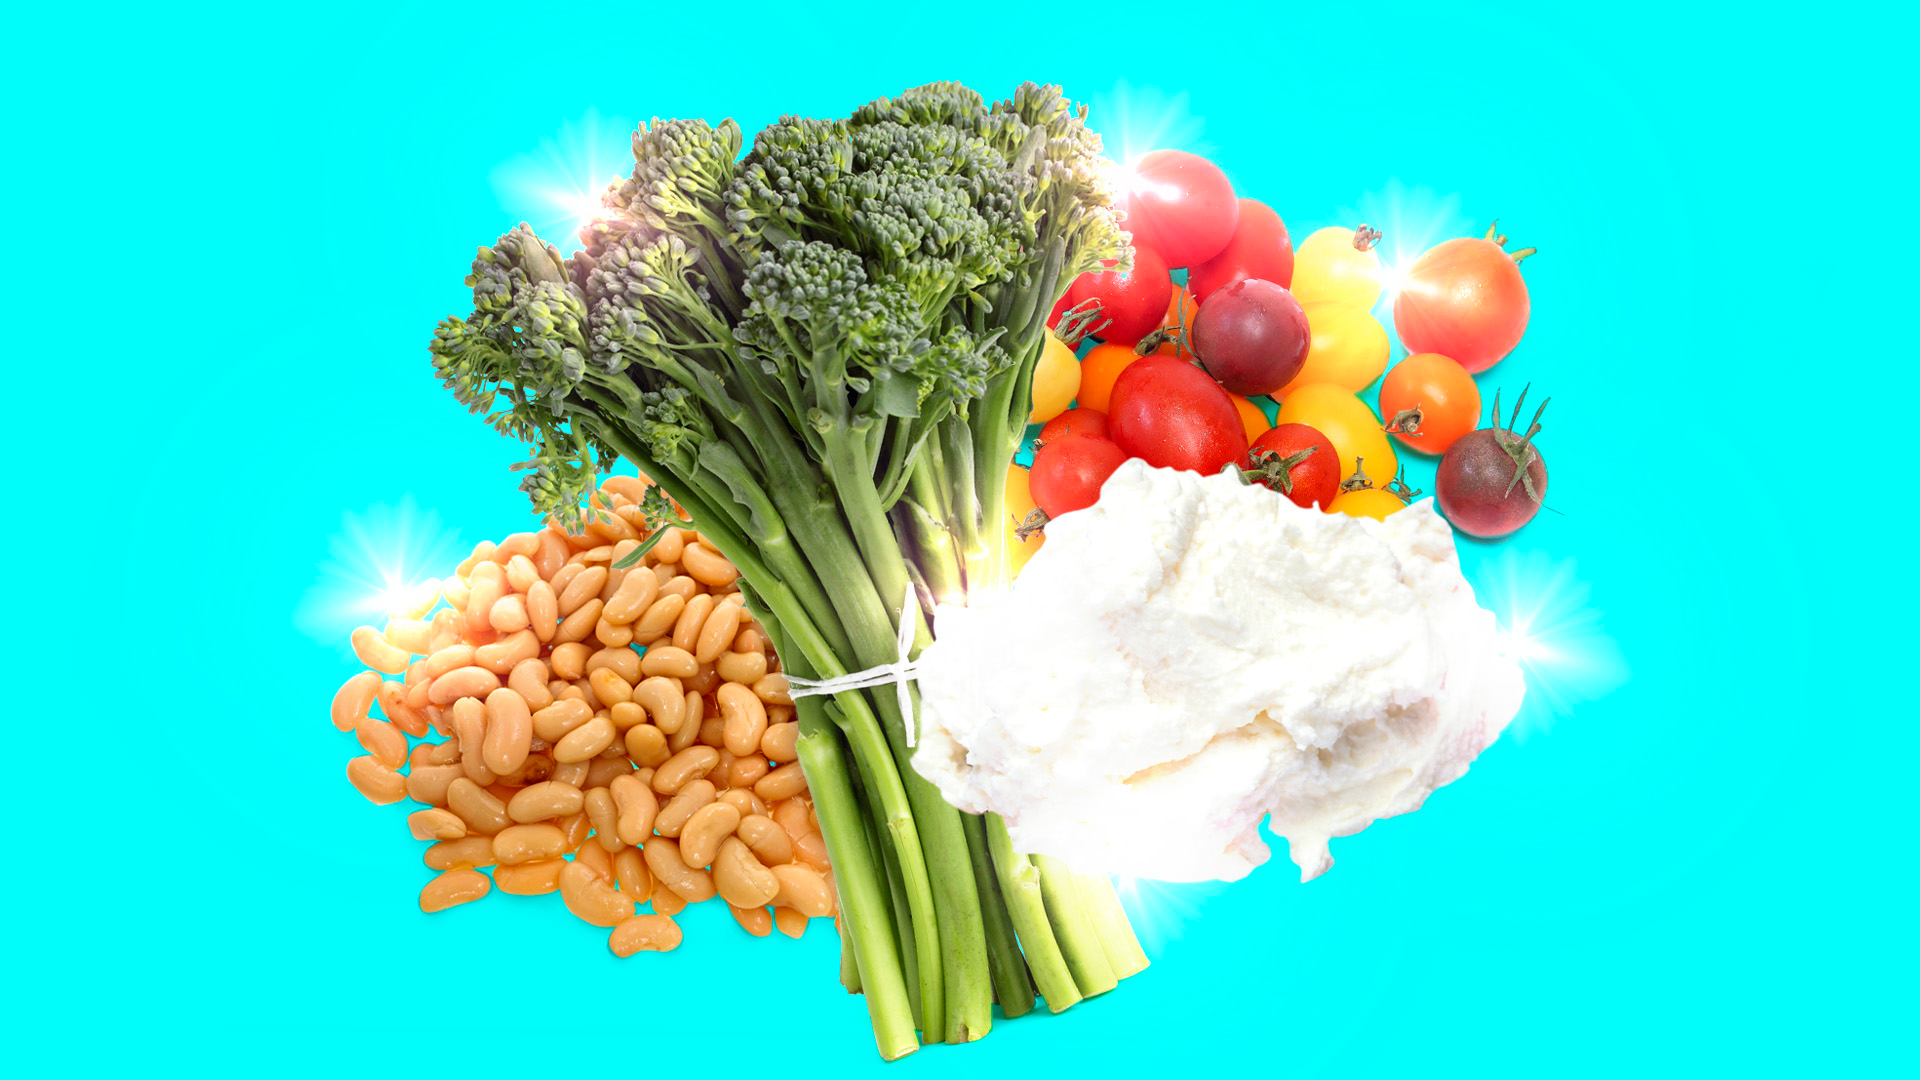
Beans, Ricotta, And Broccolini
- 3 large lemons
- 1/3 cup white wine vinegar, rice wine vinegar, or apple cider vinegar
- 10 cups milk
- 1 lb. dried cannellini beans, or whatever kind of bean you like
- 2 bunches broccolini (broccoli rabe is also good)
- 1 pint tiny, exceptionally good-looking tomatoes
- Garlic (follow your heart here)
- Olive oil
- Crushed red pepper
- Kosher salt
- Black pepper
We begin with the ricotta
Pour the vinegar into a liquid measuring cup. Zest the lemons, then use a reamer or citrus press to thoroughly extract all their juices into the vinegar. Put the zest into a small container in the fridge to use later in the recipe.
Gently stir the milk and a tablespoon of salt together in an Instant Pot; attach the lid and seal the vent. Press the YOGURT button, then press the ADJUST button until it reads BOIL, then walk away for about an hour while it does its thing. When the Instant Pot beeps open it up, then use oven mitts to gently lift out the insert and put it on the stove. (We are not using the stove, but it's a good and safe place to put anything hot.)
Pour the vinegar mixture into the milk, and then begin to stir slowly and gently with a wooden spoon or chopstick, making sure it's reaching the bottom of the pot. Continue until you begin to see a significant amount of curds separating from the whey, then walk away for about 15 minutes to let the magic happen.
Grab two large mixing bowls (if you don't have big bowls, use saucepans), and put a fine mesh strainer on top of one. Use a ladle to scoop the curds from the top into the mesh strainer, and use a rubber spatula to gently move them around in the strainer, scraping the bottom, but not pressing. Gravity is going to do all the work in draining the cheese; all you're doing is clearing a path for the whey to escape. Now, as to why you set up two bowls: eventually the bowl will be so full of whey that the strainer is submerged, at which point you can just lift the strainer up, move it to the second bowl, and keep on ladling. Once the majority of curds have been removed from the Instant Pot insert via ladle, gently push the ricotta to one side of the strainer to keep it safe, then gently pour in the remaining whey from the insert.
Put the insert back into the Instant Pot, then pour in all the strained whey. Put the strainer full of ricotta back atop one of the bowls, cover loosely in plastic wrap, and set aside so it can continue draining on its own time.
It’s bean time, baby
Thoroughly rinse one pound of dried cannellini beans, then add to the whey in the Instant Pot with three fat pinches of salt. Seal the lid, set to cook on high pressure for 40 minutes, and allow to naturally release. (If you're using a different kind of bean you'll need to adjust the cooking time, so you should Google that.)
When you open the pot, you'll see the whey has further separated into curds that have clustered together and float to the top, and a translucent, golden whey. Use a fine mesh sieve and a ladle to remove as many curds as you possibly can to a bowl, and set it aside.
Turn the Instant Pot to the saute setting and allow the beans to simmer, uncovered, for another 15-30 minutes until they are cooked to your liking. I prefer mine with a tiny bit of bite, but you can cook them to mush if that's more your style.
BONUS RECIPE ONE: CHEESE!
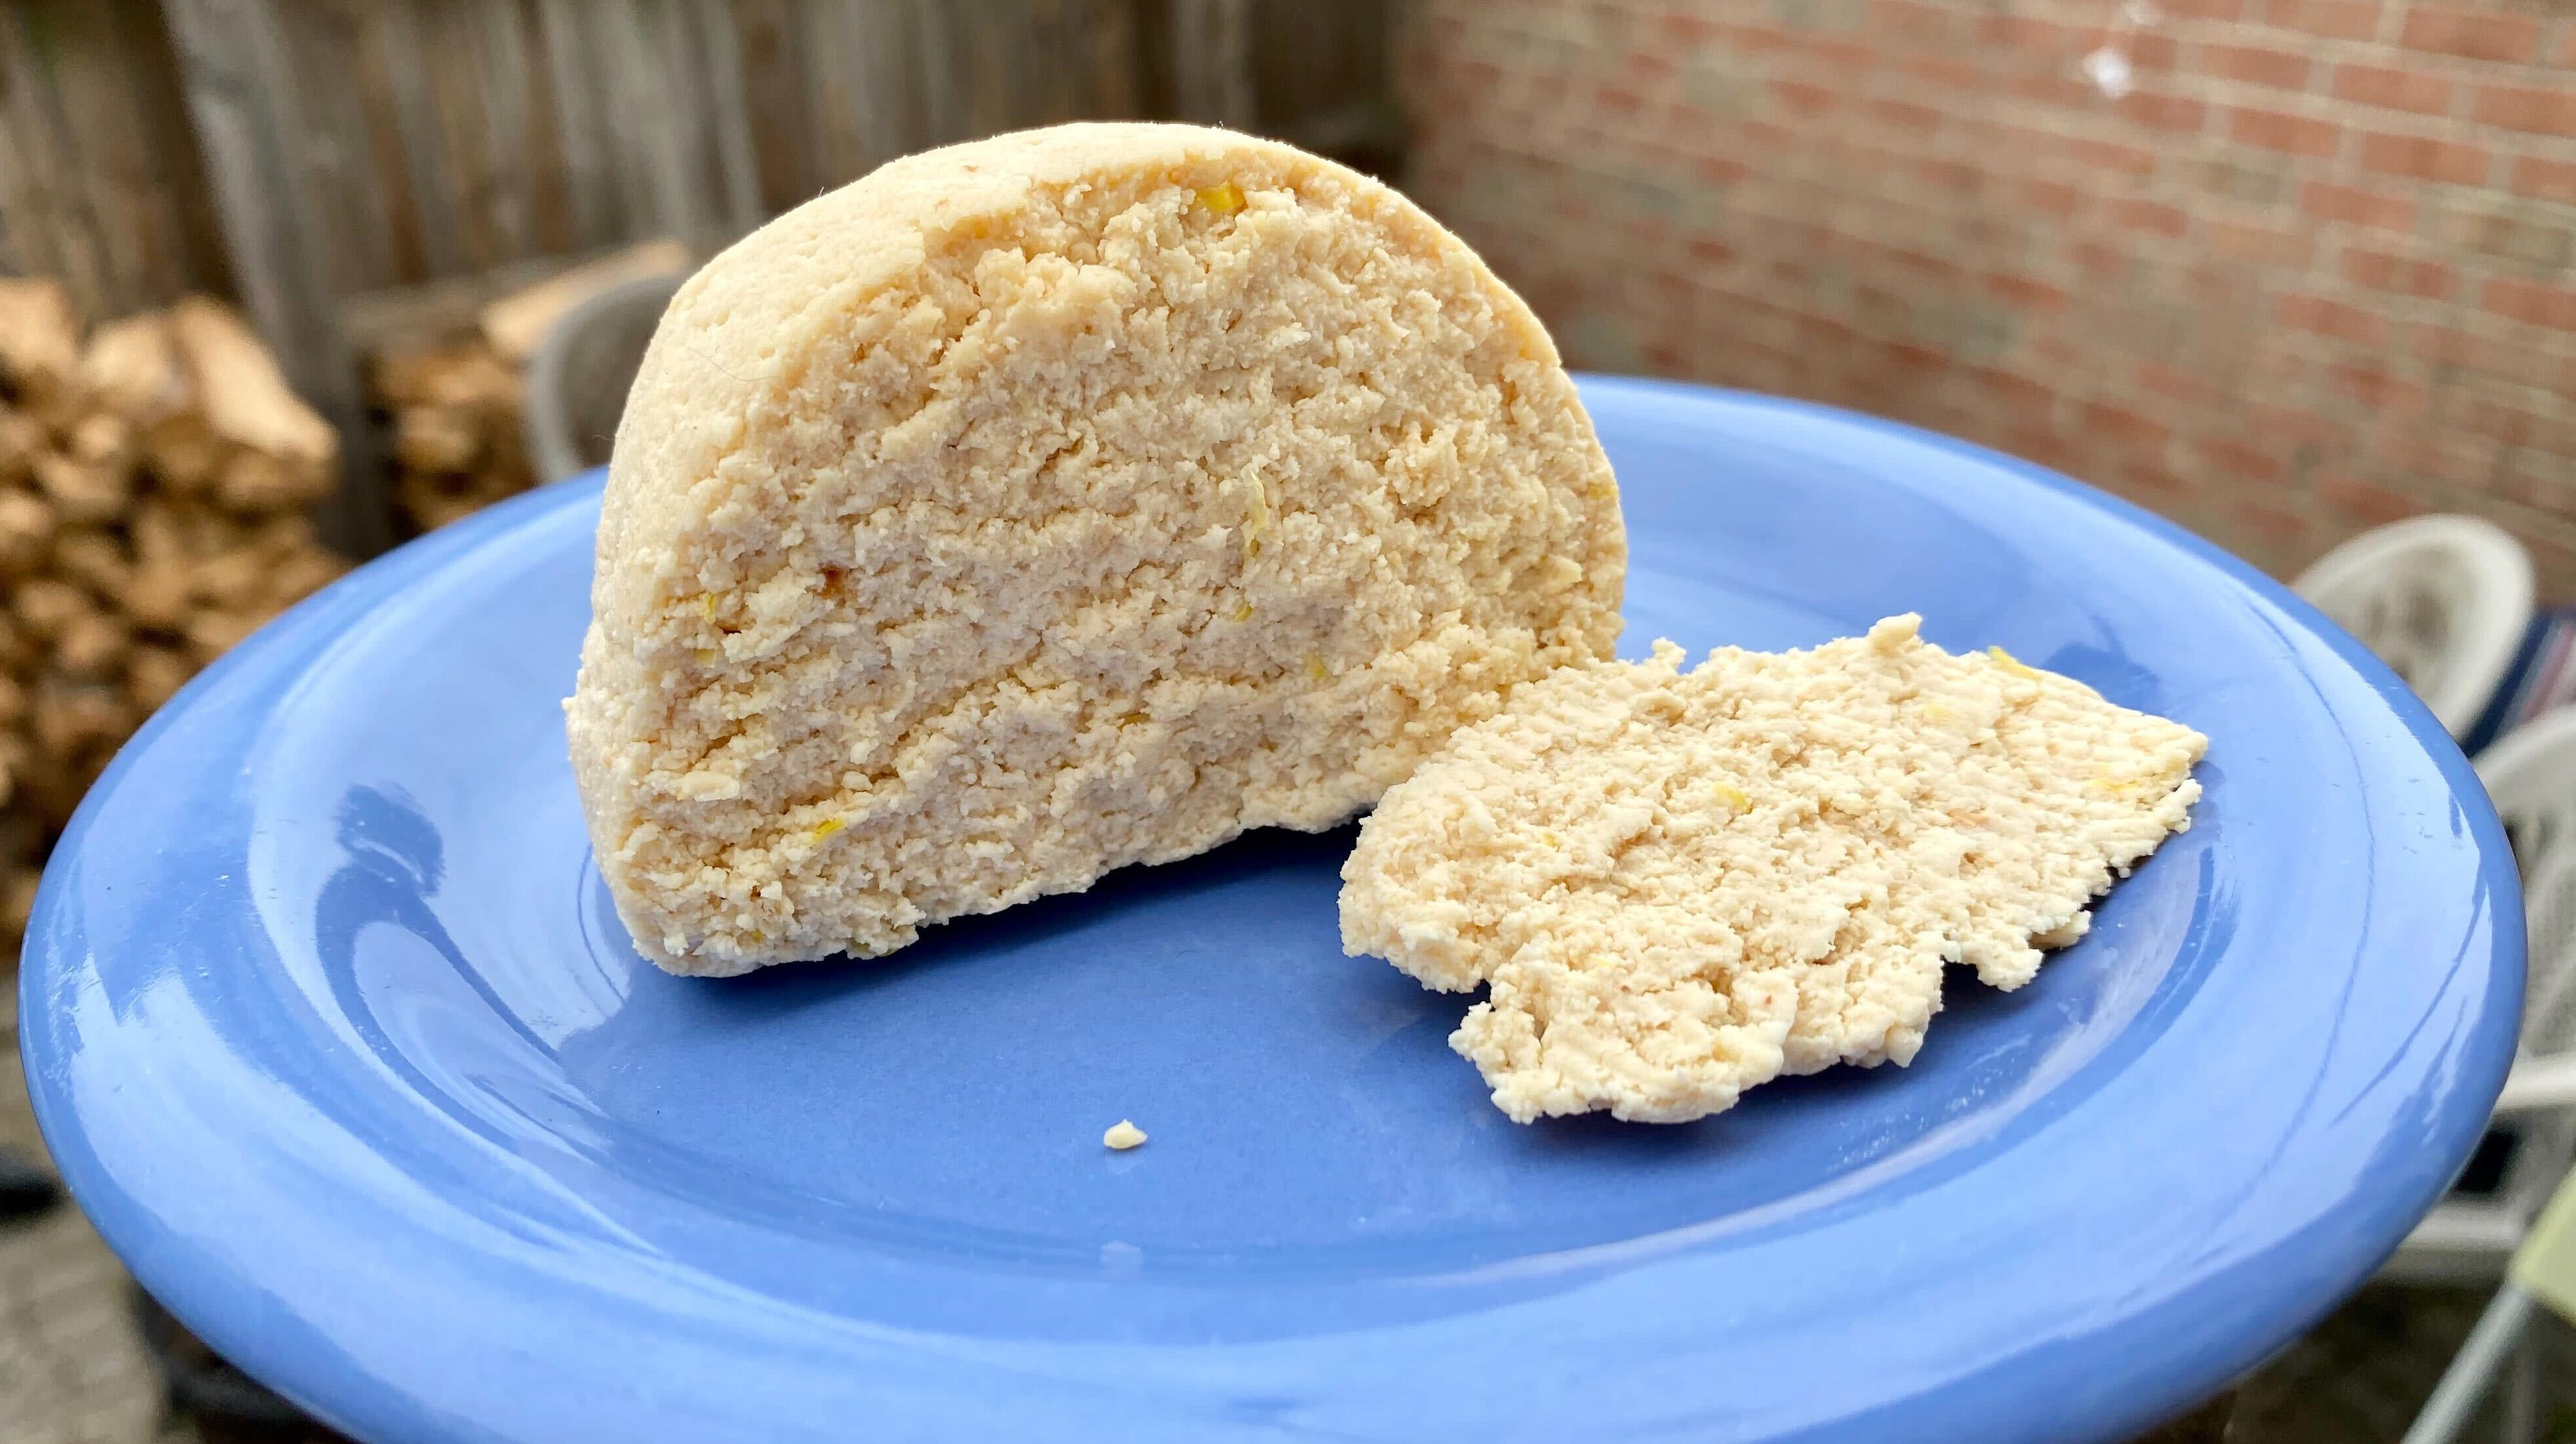
Turn your attention to the bowl of cheese curds, and whip out your nut milk bag. Using clean hands, massage the curds with a wee bit of salt and a pinch of the reserved lemon zest, then put into the nut milk bag and squeeze it. Twist it around and around and just squeeze the damn hell out of the nut milk bag. Take a small piece of plastic wrap, twist it into a rope, then use it to tie off the cheese in the bag.
To hang the cheese to dry, I put the nut milk bag into a quart container, pull it over the sides enough so the cheese sac dangles, and then pop the lid on to hold it into place. Stick your cheese in the fridge for at least a few hours to firm up; the longer you leave it, the firmer it will become.
And now, back to our originally scheduled recipe!
Put some of the fresh ricotta on a few plates, then top with beans that have been removed from the hot whey with a slotted spoon.
Wash the broccolini and put it into a large, microwave-safe bowl with 1/4 cup of water. Cover the bowl with plastic wrap, cut a few slits in it with a knife, and then microwave for 5 minutes to steam. (Alternately you can blanch the broccolini for 5 minutes; I just use the microwave because it's quicker.)
Heat a generous slick of olive oil in a skillet; using a serrated knife, slice the tiny tomatoes in half and place cut-side-down in the hot oil (an offset spatula is helpful for this). Cook the tomatoes without disturbing for about 2 minutes to sear, then remove from the pan with a spatula and divvy amongst the plates.
Add a bit more olive oil to the pan if needed; when it begins to smoke, add a pinch (or two) of crushed red pepper. Shake any excess water from the broccolini, toss in the pan with some salt and pepper, and cook until it begins to brown in spots. Add some sliced garlic (as much as you damn well please), cook for another minute or so until it's golden, then add a pinch of the reserved lemon zest and toss. Divide the broccolini between the plates, then add some freshly cracked black pepper and some very good salt.
BONUS RECIPE TWO: BREAD!
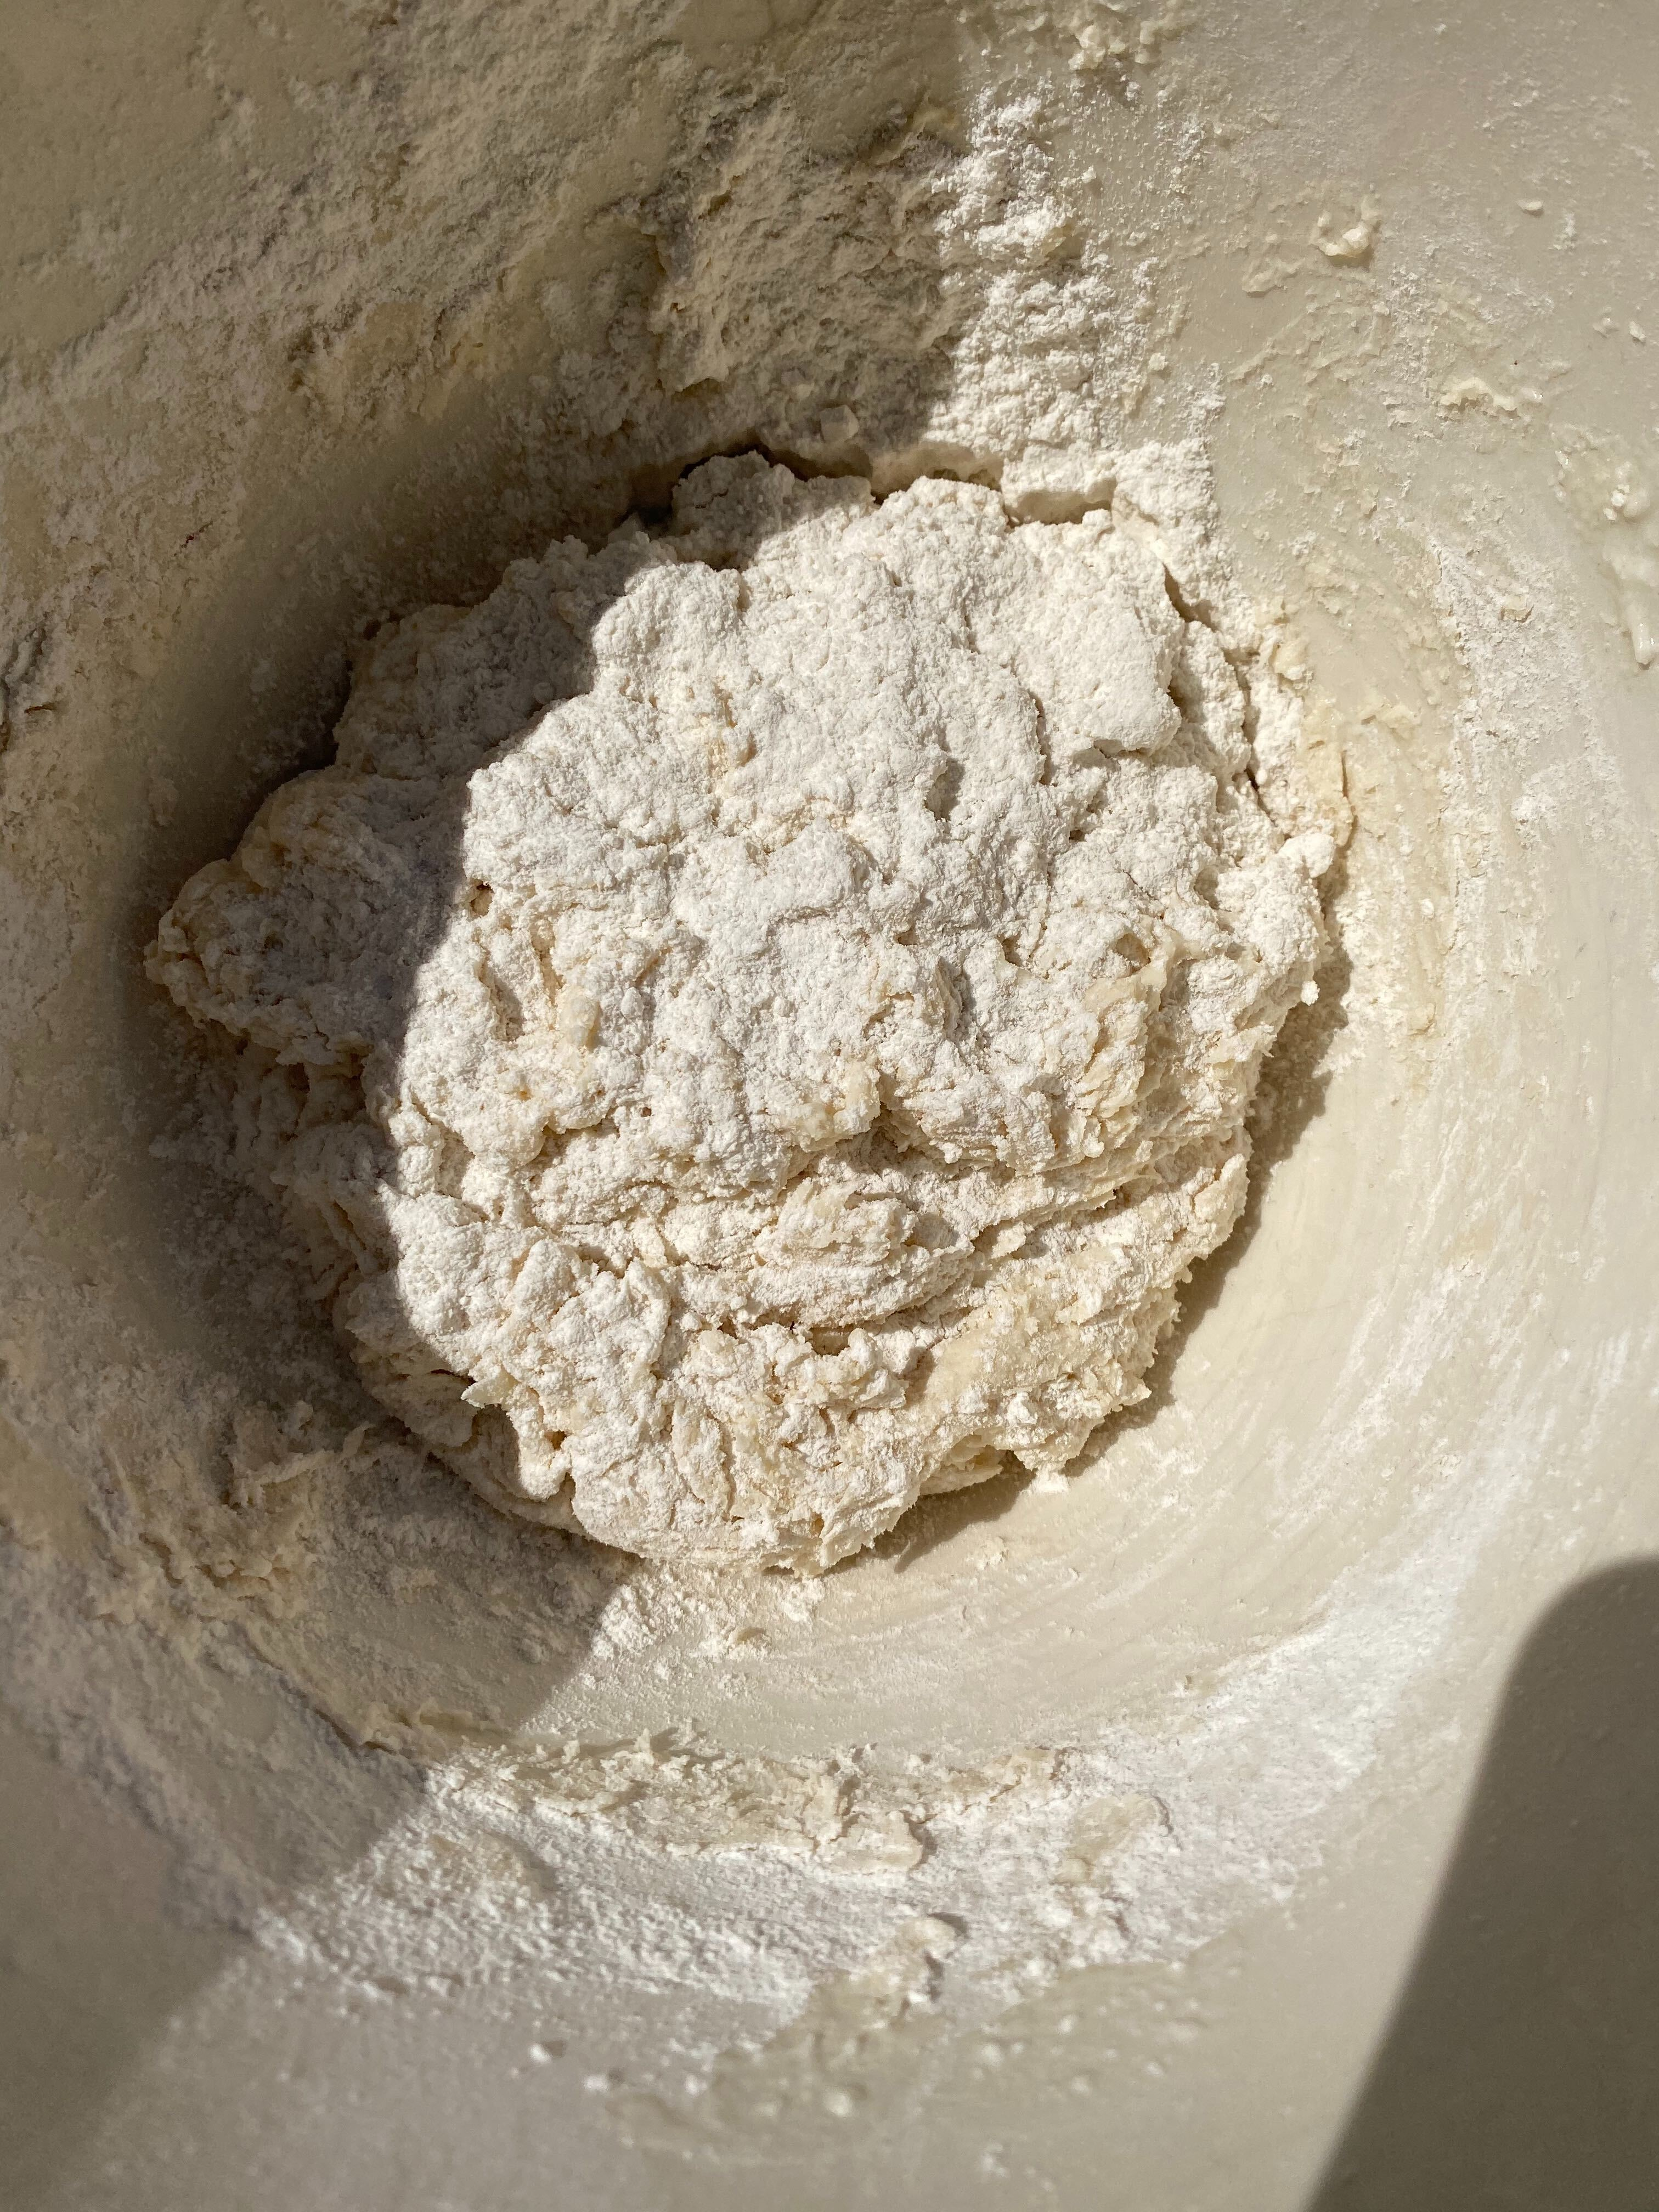
After fresh ricotta drains, it will have left a considerable amount of whey behind. Measure it out, add about 1/2 teaspoon yeast for every cup, then pour into a mixing bowl. Stir in flour a half cup at a time until you've got a soft, shaggy dough, then add a few pinches of salt. Cover the bowl with plastic wrap, and let it hang out somewhere at room temperature until the next day. (The oven is a good place to stash it!)
Now, I know what you're thinking: "Bread's a precise science that involves scales and ratios and what you're telling us to do is crazy talk!" Well, yes, many bread recipes call for scales and ratios and lots of other things to be very super serious about. There are also breads that were baked over 14,000 years ago, and I'm pretty sure the people who made those didn't have scales. You don't know how your bread is going to come out, but it's still bread, and you're still going to like it.
The next day, bake the bread as you would any no-knead bread recipe. Use visual cues (better yet, a thermometer) to tell you when it's done. Eat the bread with your bonus cheese and bean soup. Revel in your awesome powers. You did good, kid. You did good.