A Chilaquiles Private Lesson With Rick Bayless
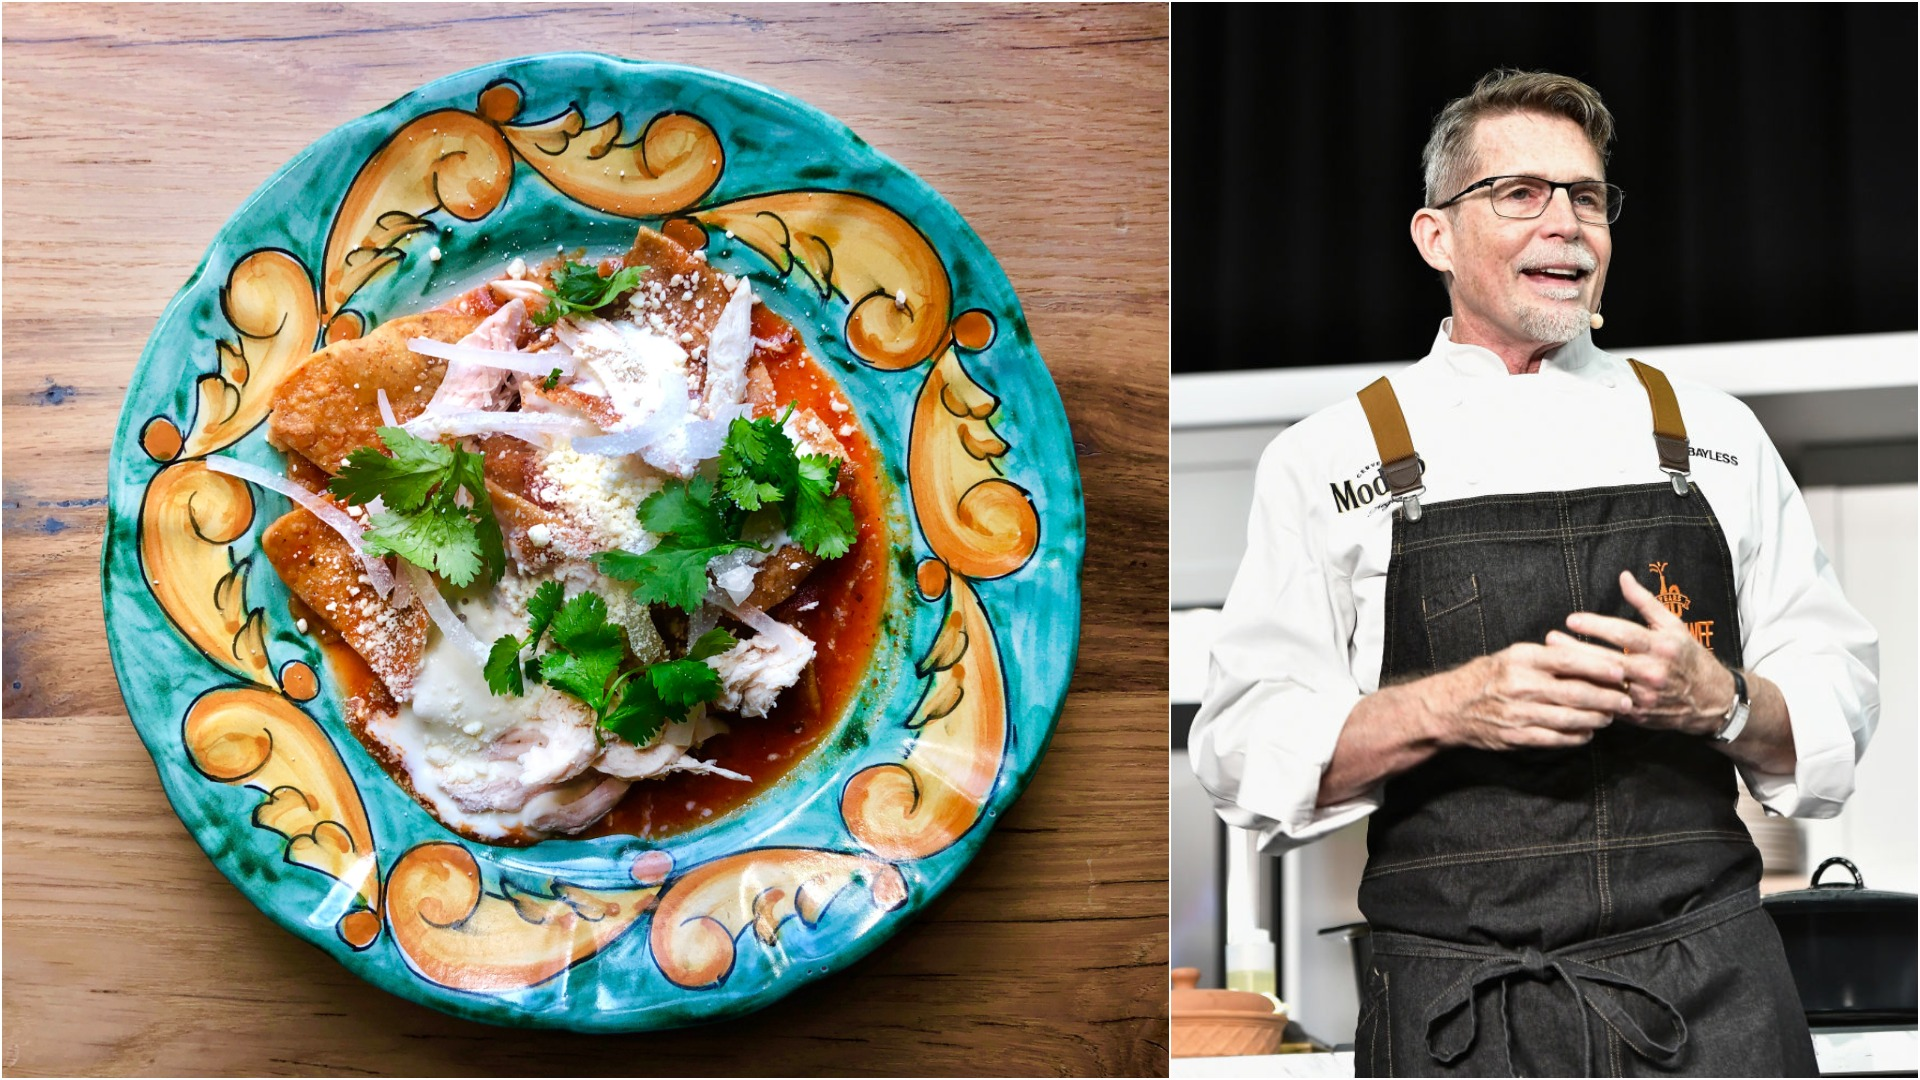
An e-mail arrived in my inbox a few weeks ago, asking if I was interested in taking a chilaquiles lesson with Rick. Chilaquiles, of course, being the comforting tortilla-in-broth cure-all of Mexican gastronomy, and Rick being Rick Bayless, the Chicago chef, Mexico evangelist, and sole reason that O'Hare Airport is tolerable.
It was hard to say no. The greatest perk of this Takeout job is standing shoulder-to-shoulder with chefs and getting a crash course on one dish (I now make great omelets and spaghetti carbonara, if I may be so bold). So chilaquiles—fried tortilla simmered in salsa and topped with, well, anything—seemed a perfect next recipe to master: A dish requiring minimal ingredients and skill that could be greatly improved with a few strategic techniques.
I've written about Bayless for more than a decade, and he's never not been a fount of energy and enthusiasm. He's opened a new bar in Chicago, has a line of chips, salsas, and frozen foods you can't escape from the supermarket, and currently hosting a 12th season of his PBS show Mexico One Plate At A Time—basically, Bayless is out to make us all look like lazy ne'er-do-wells.
And so it is with this private chilaquiles lesson that Bayless, as is his wont, enthuses and cheerleads this humble Mexican staple with Baylessian gusto. Can you imagine a teacher who gets this excited over chicken noodle soup? Well, Bayless got me awfully excited about chilaquiles too.
(Two recipes—a more-involved tomatillo sauce from scratch, and a simple one with jarred salsa—are included below.)
Lesson 1: Embrace the halfway texture
Chilaquiles is popular in much of Mexico (though less so in the Yucatan, which has its own separate cuisine) because of the surplus of tortillas. When fresh tortillas get cold, reheating them doesn't yield a good second-day product. Chilaquiles were born from this convenience: Why not fry those stale tortillas until crisp and pour sauce over it? Here, Bayless mentions a texture he says is beloved in Mexico, the one that straddles crispiness and sogginess. It's the sensation of your teeth encountering squishiness but then quickly hitting on resistance. Which is why timing is important during the cooking—we'll tackle this in lesson three.
Lesson 2: Fry the sauce
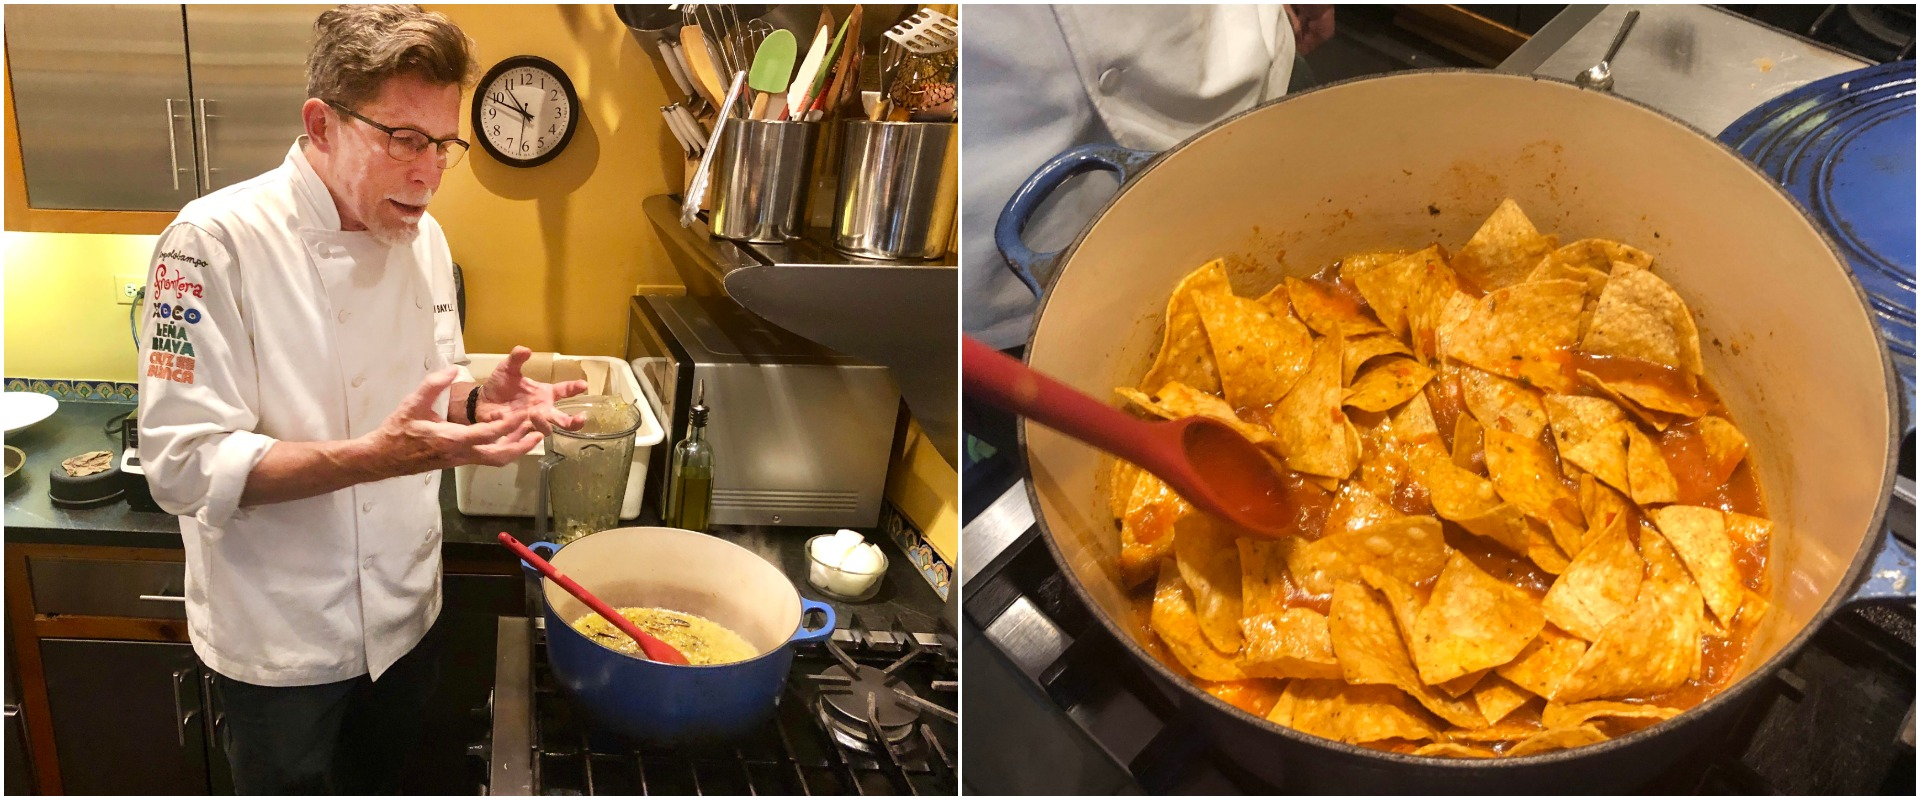
Bayless sautés his roasted tomatillos in a 7-quart Dutch oven over a fairly high heat. He says this step is "one of the most crucial in Mexican cooking," and he calls it the "frying the sauce phase." The goal, he says, is to sear the ingredients and cook it down until it's the consistency of tomato paste. "This does two things," Bayless says. "It brings out a sweetness but also fuses the flavors." This step can take anywhere from 4-8 minutes.
Only after he reduces the sauce will he add the shredded chicken or vegetable broth, and at this point he likes to throw in a handful of greens—spinach, Swiss chard, or the most common herb for chilaquiles, epazote. He tears a few leaves of epazote, lets simmer for 2-3 minutes, before adding in the chips. Regarding quantity of sauce: "You'll be surprised by how much sauce you need because the chips will soak it all up," Bayless says. "One of the mistakes people make is they don't use enough sauce."
Lesson 3: Turn off heat, cover with lid, let sit
Chilaquiles' texture is a subjective thing. Some people will toss the chips into the sauce and plate immediately, which makes for a final product with more crunch. But to achieve that halfway crisp-sog texture mentioned above, Bayless does this: He tosses the tortilla chips in the pot, stirs it a few times to barely cover in sauce, turns off the heat, cover with the lid, and let it sit for a few minutes.
For this reason, he suggests using a large pot like Le Creuset to cook chilaquiles, rather than a skillet. With a skillet, the liquid evaporates faster, while steaming the dish with a covered lid will help gently soften the chips with residual heat.
The last step: Remove the lid and plate before you think it's ready—the chips will continue softening as you serve the dish. Think of achieving al dente-state in pasta: You remove the noodles from the water 30 seconds before you think it's done.
Lesson 4: Topping considerations
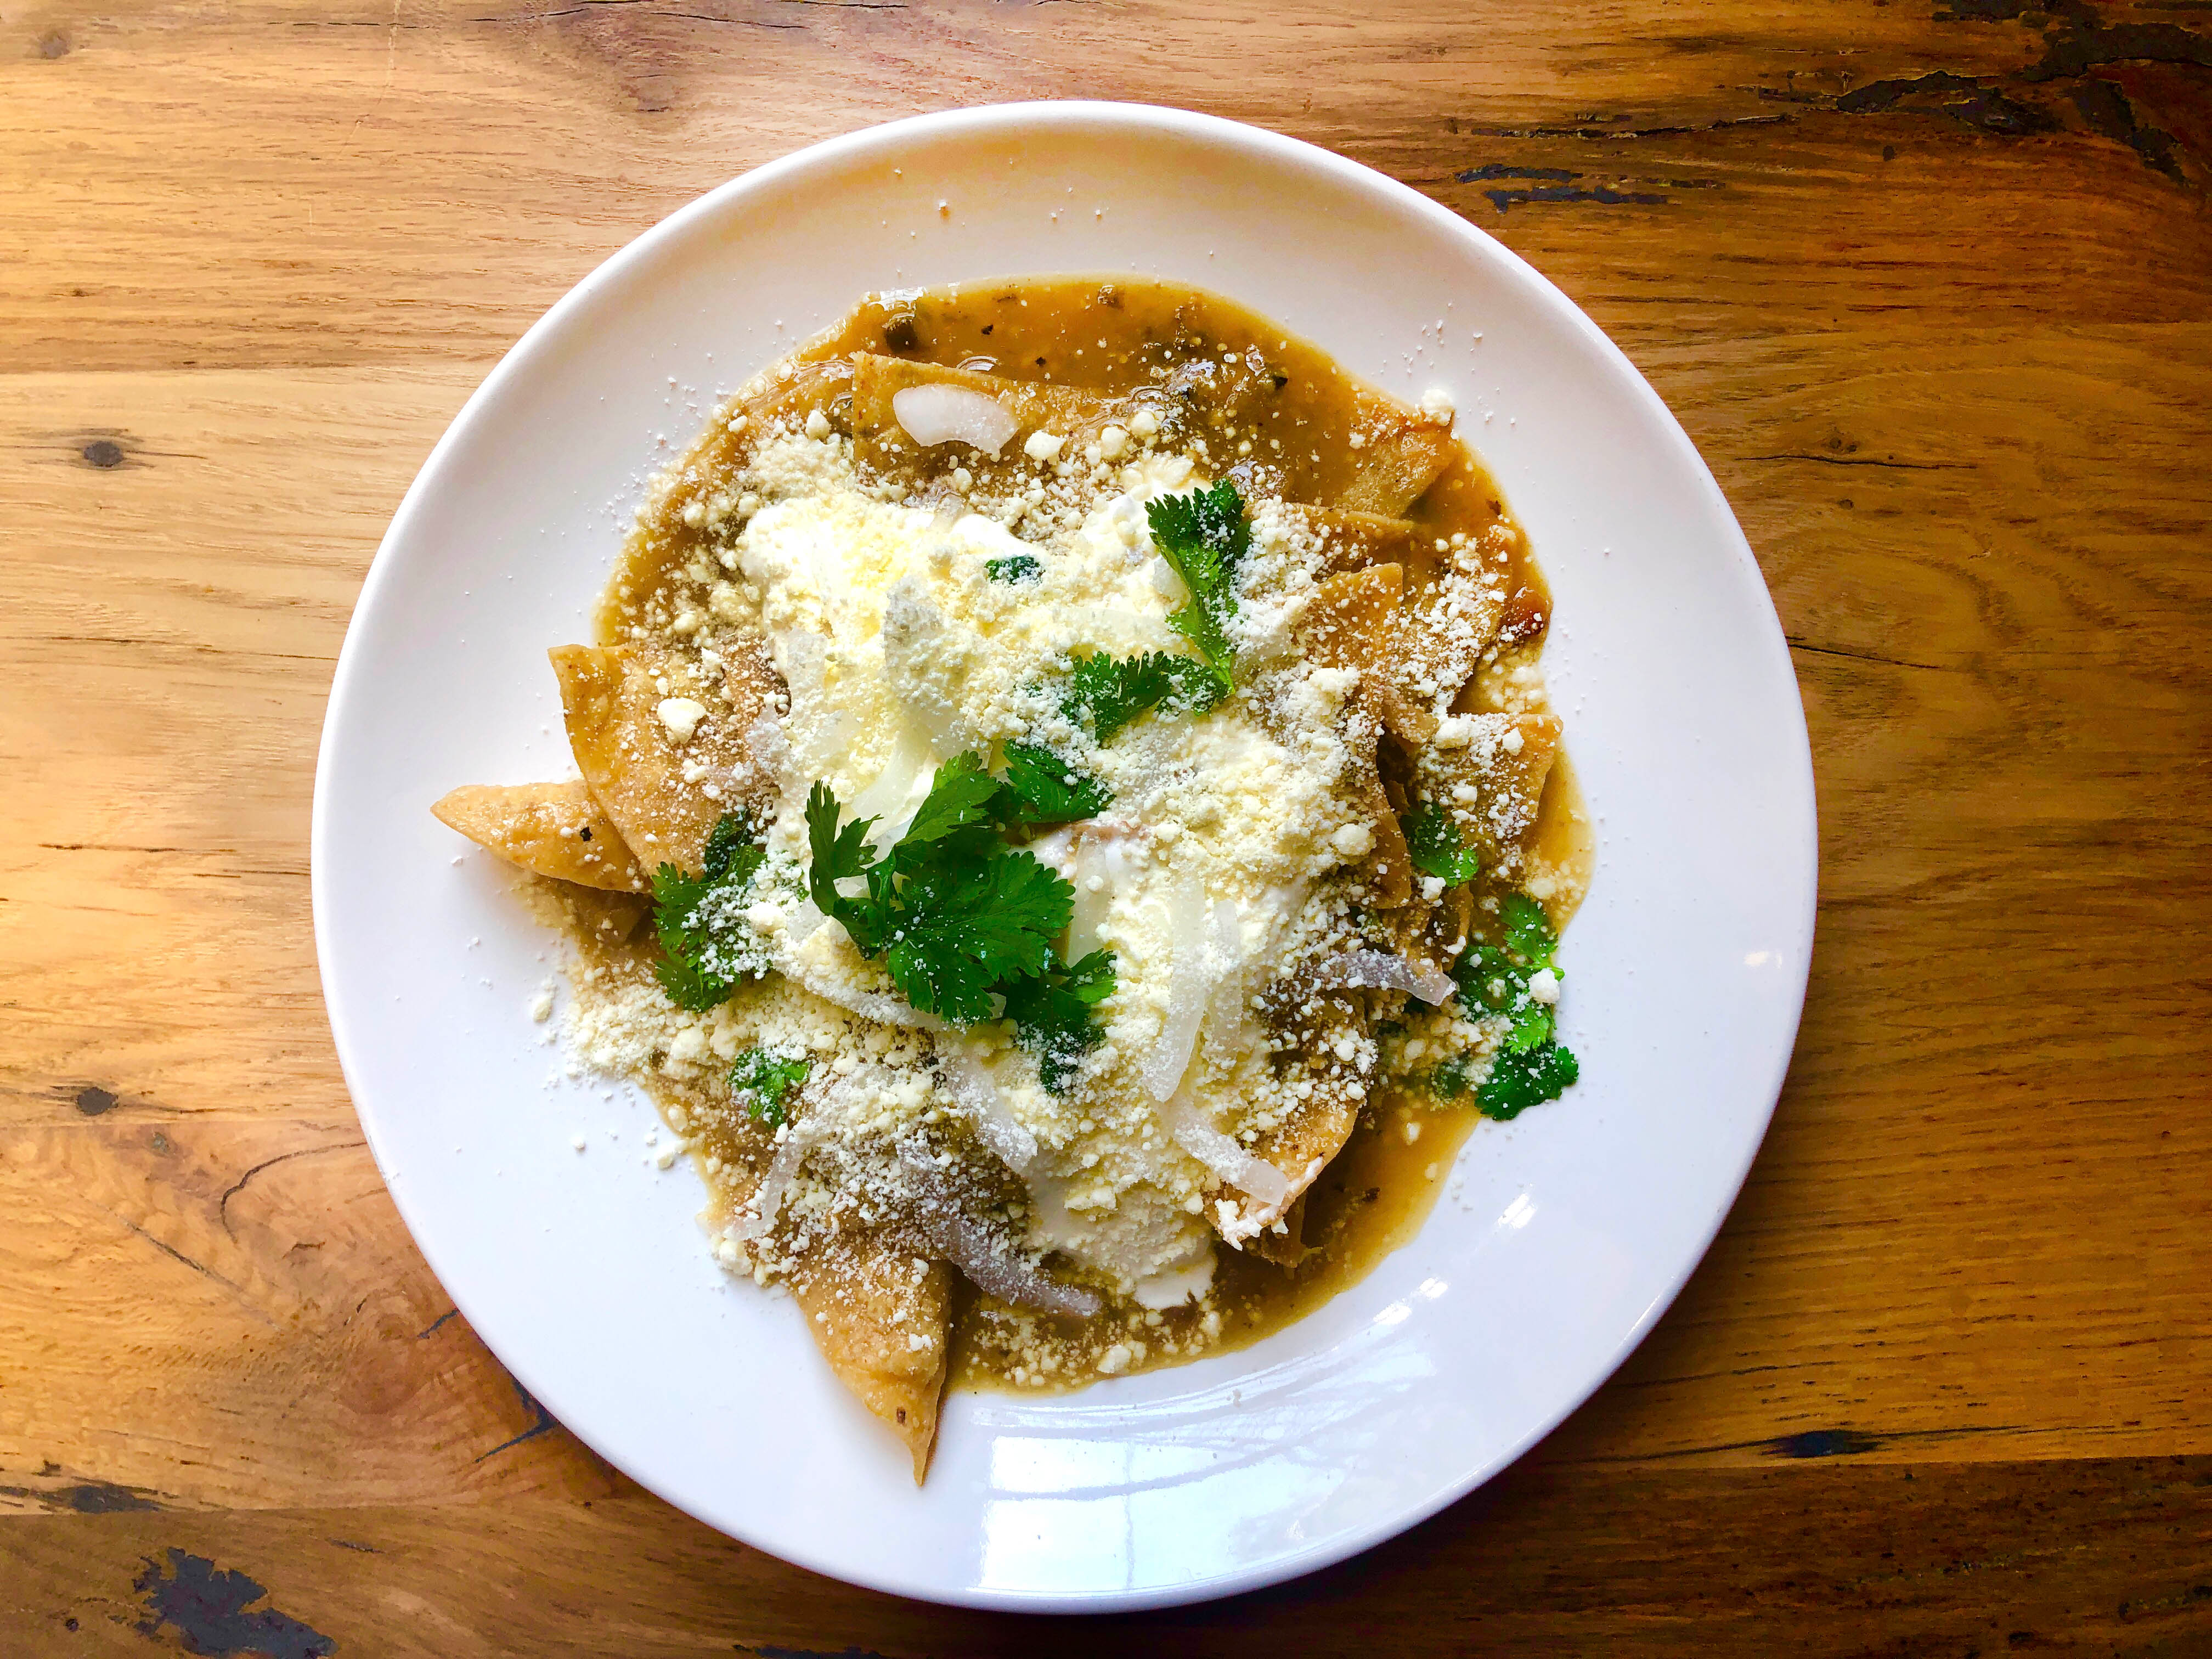
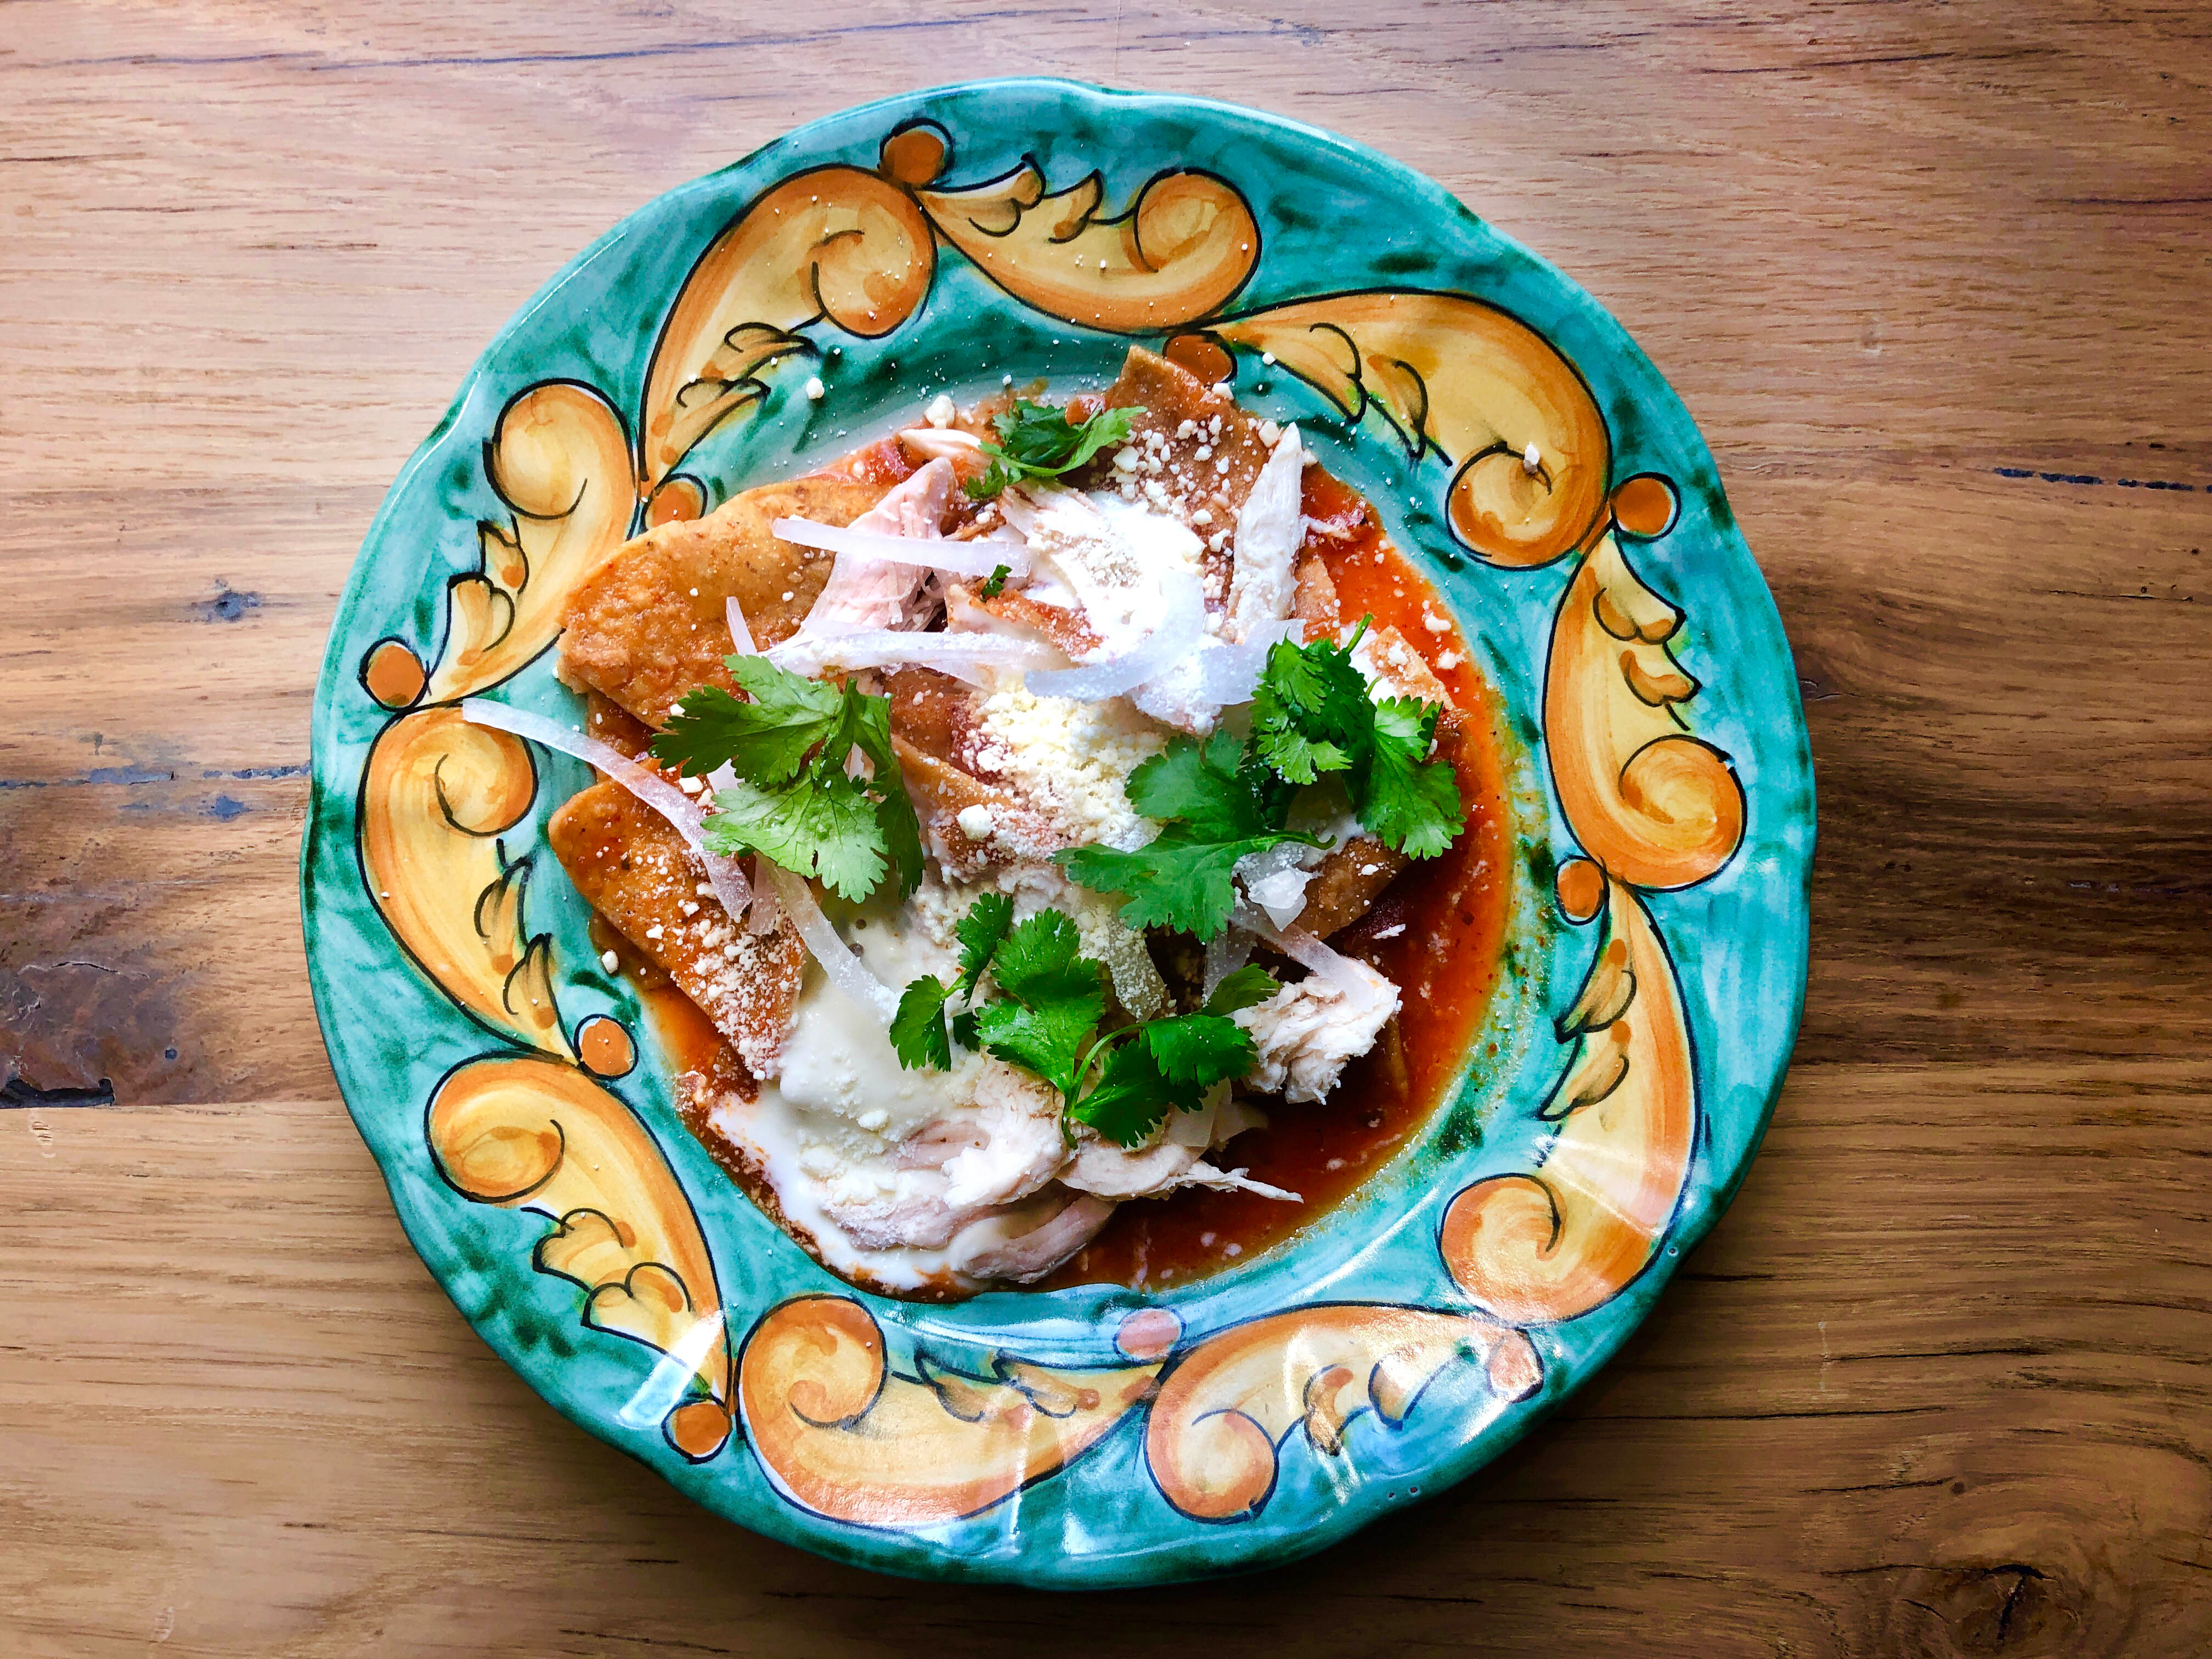
The classic toppings for chilaquiles? Thinly sliced onions, a salty grated cheese such as queso añejo, and crema. If you can't source Mexican crema, find a good-quality sour cream and thin it with a little milk. It's also easy to make homemade creme fraiche.
Want to top it with a fried egg? That's very much an American variant, seldom found in Mexico—but don't let that stop you.
Bonus Lesson: The place for chilaquiles in Mexico
If there's one place to experience chilaquiles in Mexico City, Bayless says it's La Esquina del Chilaquil. But it's not what you think. They scoop red or green chilaquiles into torta rolls, and sandwich a fried cutlet of milanesa in between. And according to Bayless, "It's one of the most delicious things I've ever had."
Green Chilaquiles
Recipe by Rick Bayless, serves 4 as a casual main dish
- 12 (10 oz. total) corn tortillas, cut into sixths, and fried or baked to make chips, or 8 oz. (8 to 12 loosely packed cups, depending on thickness) thick, homemade-style tortilla chips (like the ones you buy at a Mexican grocery)
- 1 1/2 lbs.(9 to 12 medium) tomatillos, husked and rinsed
- 2-3 fresh serrano chiles, stemmed
- 1 large white onion, sliced 1/4-inch thick
- 3 garlic cloves, peeled and finely chopped
- 2 1/2 cups chicken broth or vegetable broth, plus a little extra if needed
- Salt
- About 1/3 cup homemade crema, creme fraiche or store-bought sour cream thinned with a little milk
- 1/4 cup or more finely crumbled Mexican queso añejo or other dry grating cheese such as Romano or Parmesan
- A handful of fresh epazote leaves, roughly chopped
1. The chips. Make the chips or measure out the store-bought chips.
2. The brothy sauce. Spread the tomatillos and chiles onto a baking sheet and place them four inches below a very hot broiler. When they're darkly roasted (they'll be blackened in spots), about five minutes, flip them over and roast the other side—five minutes more will give you splotchy-black and blistered tomatillos that are soft and cooked through. Cool. Transfer to a blender, along with all the juices on the baking sheet. Blend the tomatillos and chiles to a puree, but one that still retains a little texture. You should have 2 1/4 cups puree.
Over medium heat, set a medium-large (4- to 5-quart) pot or Dutch oven—you'll need a lid for whichever vessel you choose. Measure in the oil, add half of the onion and cook, stirring regularly, until golden, about 7 minutes. Add the garlic and stir for another minute, then raise the heat to medium-high. Add the tomatillo puree and stir nearly constantly for 4 or 5 minutes, until the mixture thickens somewhat. Stir in the broth or water and season with salt, usually about 1/2 teaspoon if you are using salted chips. Cover the pot if not continuing with Step 3 right away. You should have 4 1/2 cups of broth mixture.
3. Cooking and serving the chilaquiles. Set out the remaining onion, crema, and cheese. Put the pot over medium-high heat until the brothy sauce boils. Stir in the epazote and the tortilla chips, coating all the chips well. Let return to a rolling boil, cover and turn off the heat. Let stand five minutes, no longer.
Uncover and to check that the chips have softened nicely—they should be a little chewy, not mushy. (If they're too chewy, stir in a few tablespoons more broth, cover and set over medium heat for a couple minutes more.)
Either spoon onto warm individual plates in the kitchen or serve directly from the vessel it was made in. Drizzle the chilaquiles with the crema (or one of its stand-ins), strew with the remaining sliced onion, and dust generously with the finely crumbled cheese.
Working Ahead: The brothy sauce (Step 2) can be completed up to 3-4 days ahead; store in the refrigerator, covered. Chilaquiles lose texture once they're made, so I complete the simple tasks of cooking and serving them when everyone's ready to eat. Homemade chips for chilaquiles are fine made a day or two in advance.
Quick Chilaquiles
- 1 jar (16 oz.) salsa—tomato, tomatillo, chipotle, anything you'd like
- 2 cups chicken or vegetable broth
- 8 oz. tortilla chips (about 8 loosely packed cups)
- 1/2 cup freshly grated Mexican queso añejo or other garnishing cheese such as Romano or Parmesan
- Shredded cooked chicken and sour cream, optional
- Thinly sliced onion for garnish
- Chopped cilantro for garnish
Heat the salsa and broth together in a large saucepan to boiling. Stir in the chips, coating them with the salsa mixture. When the mixture comes to a simmer, cover the pan and remove it from the heat. Let stand for five minutes. Spoon onto warmed plates. Sprinkle with cheese, shredded chicken, sour cream, onion and cilantro. Serve right away.
Green Chilaquiles and Quick Chilaquiles recipes reprinted with permission from rickbayless.com.