Betty Ford's Thanksgiving Chocolate Cookies Are A '70s Masterpiece
Of all the first ladies, Betty Ford was the coolest. Michelle Obama was hip, to be sure, and Jacqueline Kennedy was elegant. But Betty Ford spoke her mind, stood up for women's rights, and was open about her fight with breast cancer. After her husband, Gerald R. Ford, left office, Mrs. Ford sought treatment for alcoholism and an addiction to painkillers, and famously founded the Betty Ford Center. She also loved cookies, and even found them worthy of a place at her Thanksgiving feast.
Though President Ford only had a short stint in office from 1974 to 1976, and the Fords spent at least one Thanksgiving at their vacation home in Vail, Colorado, rather than at the White House, they still left their mark on Thanksgiving culinary traditions. Notably, President Ford began the hokey presidential rite of pardoning the official Thanksgiving turkey. (You might say he had experience in pardons.)
Being from Michigan, I wanted to track down one of Betty Ford's Thanksgiving recipes—preferably the cookie recipe—so I emailed her daughter Susan Ford Bales and asked if she would share some. Back came two from the Gerald R. Ford Presidential Foundation in Grand Rapids, Michigan, Mrs. Ford's hometown.
One recipe was for scalloped potatoes; the other was for the coveted Double Chocolate Chip Cookies. First ladies have shared cookie recipes in the past, but they don't generally make them part of Thanksgiving dinner. Dessert is often pie, although Eleanor Roosevelt liked Indian pudding. Scanning the recipe, these seemed irresistible, and also complicated.
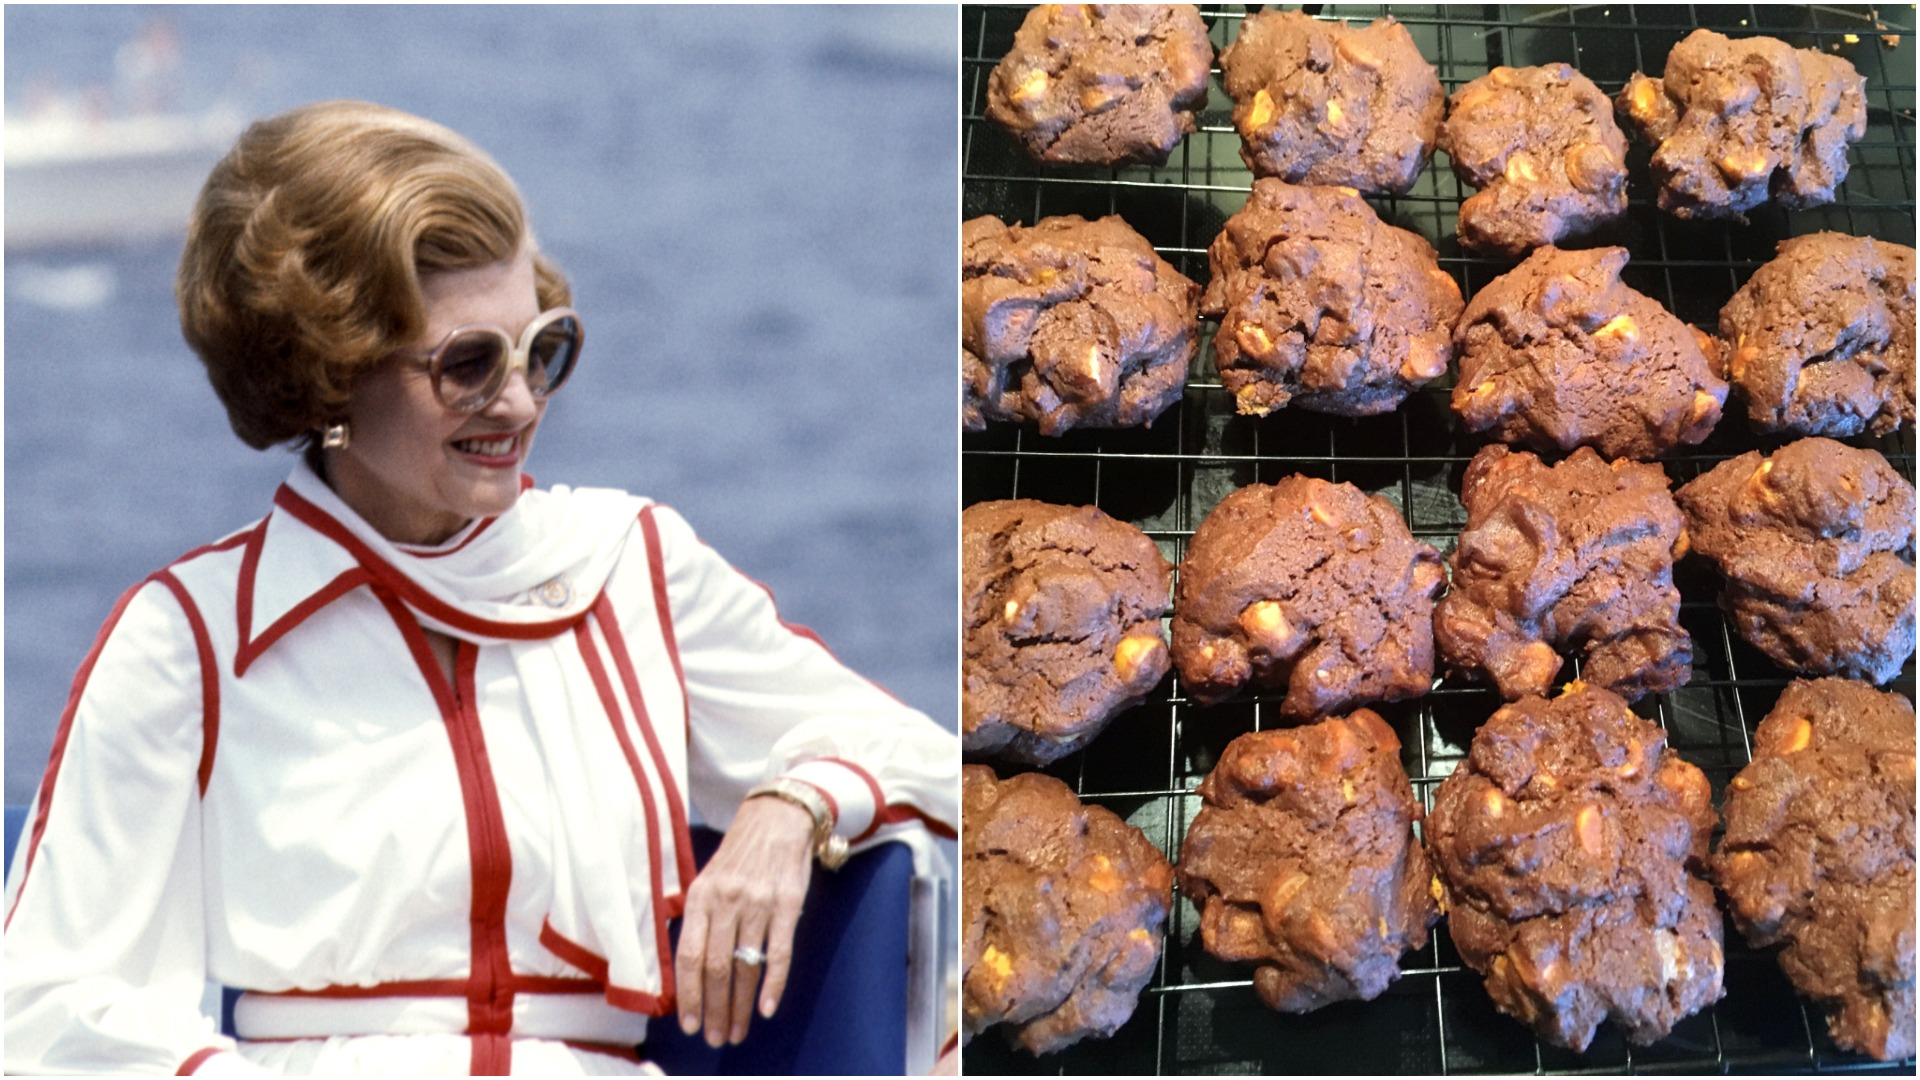
These are not your Trader Joe's break-apart-and-bake chocolate chip cookies, or even the recipe from the back of Nestle's Toll House Chocolate Chips. First of all, the cookie recipe's name is a misnomer. They aren't double chocolate. They're triple chocolate, containing melted chocolate, cocoa, and chocolate chips. And when was the last time you put sour cream in a cookie? As you read the ingredients, it occurs to you why the Fords were known for their zeal for skiing, regardless of the president's alleged clumsiness. They'd have to hit the slopes to burn off these cookies.
Such indulgent cookies are a time commitment—they require roughly two hours from mixing to cleanup. But when you're done, you're rewarded with deeply rich, First Lady-approved triple chocolate cookies guaranteed to be gone by the end of Thanksgiving dinner.
Betty Ford’s Double Chocolate Cookies
Makes approximately 20 cookies
- 1 cup of butter, softened (see footnote)
- 1 3/4 cups granulated sugar (see footnote)
- 2 eggs
- 2 tsp. vanilla or brandy
- 1 oz. unsweetened baking chocolate, melted
- 1/4 cup sour cream
- 2 cups flour
- 3/4 cup cocoa
- 1/2 tsp. baking soda
- 1/2 tsp. salt (omit if using salted nuts)
- 1/4 tsp. baking powder
- 2 cups white chocolate chips (or butterscotch)
- 1 cup chopped Brazil nuts or almonds
Pre-heat the oven to 350 degrees Fahrenheit. In a mixer, beat together the butter and sugar until light and fluffy. Add the eggs one at a time, and beat well. Add the brandy or vanilla. Stir in the melted chocolate and the sour cream. (You can melt the chocolate in the microwave, but do this gradually, because baking chocolate can easily scorch. Microwave it one minute, then in 30-second intervals. As soon as the chocolate has lost its solid shape, take it out and stir it until smooth.)
In a separate bowl, combine the dry ingredients. Mix them all together with a fork, and then a spoon. Turn the mixer back on at a low speed, and add the dry ingredients, about a cup at a time. Incorporate everything thoroughly.
Stir in the chocolate chips and the nuts. Drop dough by tablespoonfuls onto cookie sheets. (You can use ungreased cookie sheets, or line them with parchment paper. I prefer parchment because I found the cookies would sometimes stick to the ungreased cookie sheets, but the cookies can dry out a little with parchment, making them more like a biscotti, so for a gooey cookie, bake them at the lower end of the time scale.)
Bake for 12-15 minutes. Twelve minutes is enough for a softer cookie; 15 minutes gives you a firmer cookie. These cookies do not spread on the baking sheet, and because they're so rich, the smaller size seems just right. Let the cookies rest on the cookie sheet for five minutes before you move them to wire racks or towel paper to finish cooling.
Footnote: This recipe is pretty retro, and you might look at the ingredients and exclaim, "Two sticks of butter? All that sugar?" as I originally did. Experiment, if you like. You can cut the butter in half. You can also cut back on the sugar—I found that one cup was enough to get a nice, creamy texture. But who was ever mad about more butter and sugar at Thanksgiving?