Canning 101: Taking Stock Of The "Garbage" In Your Freezer
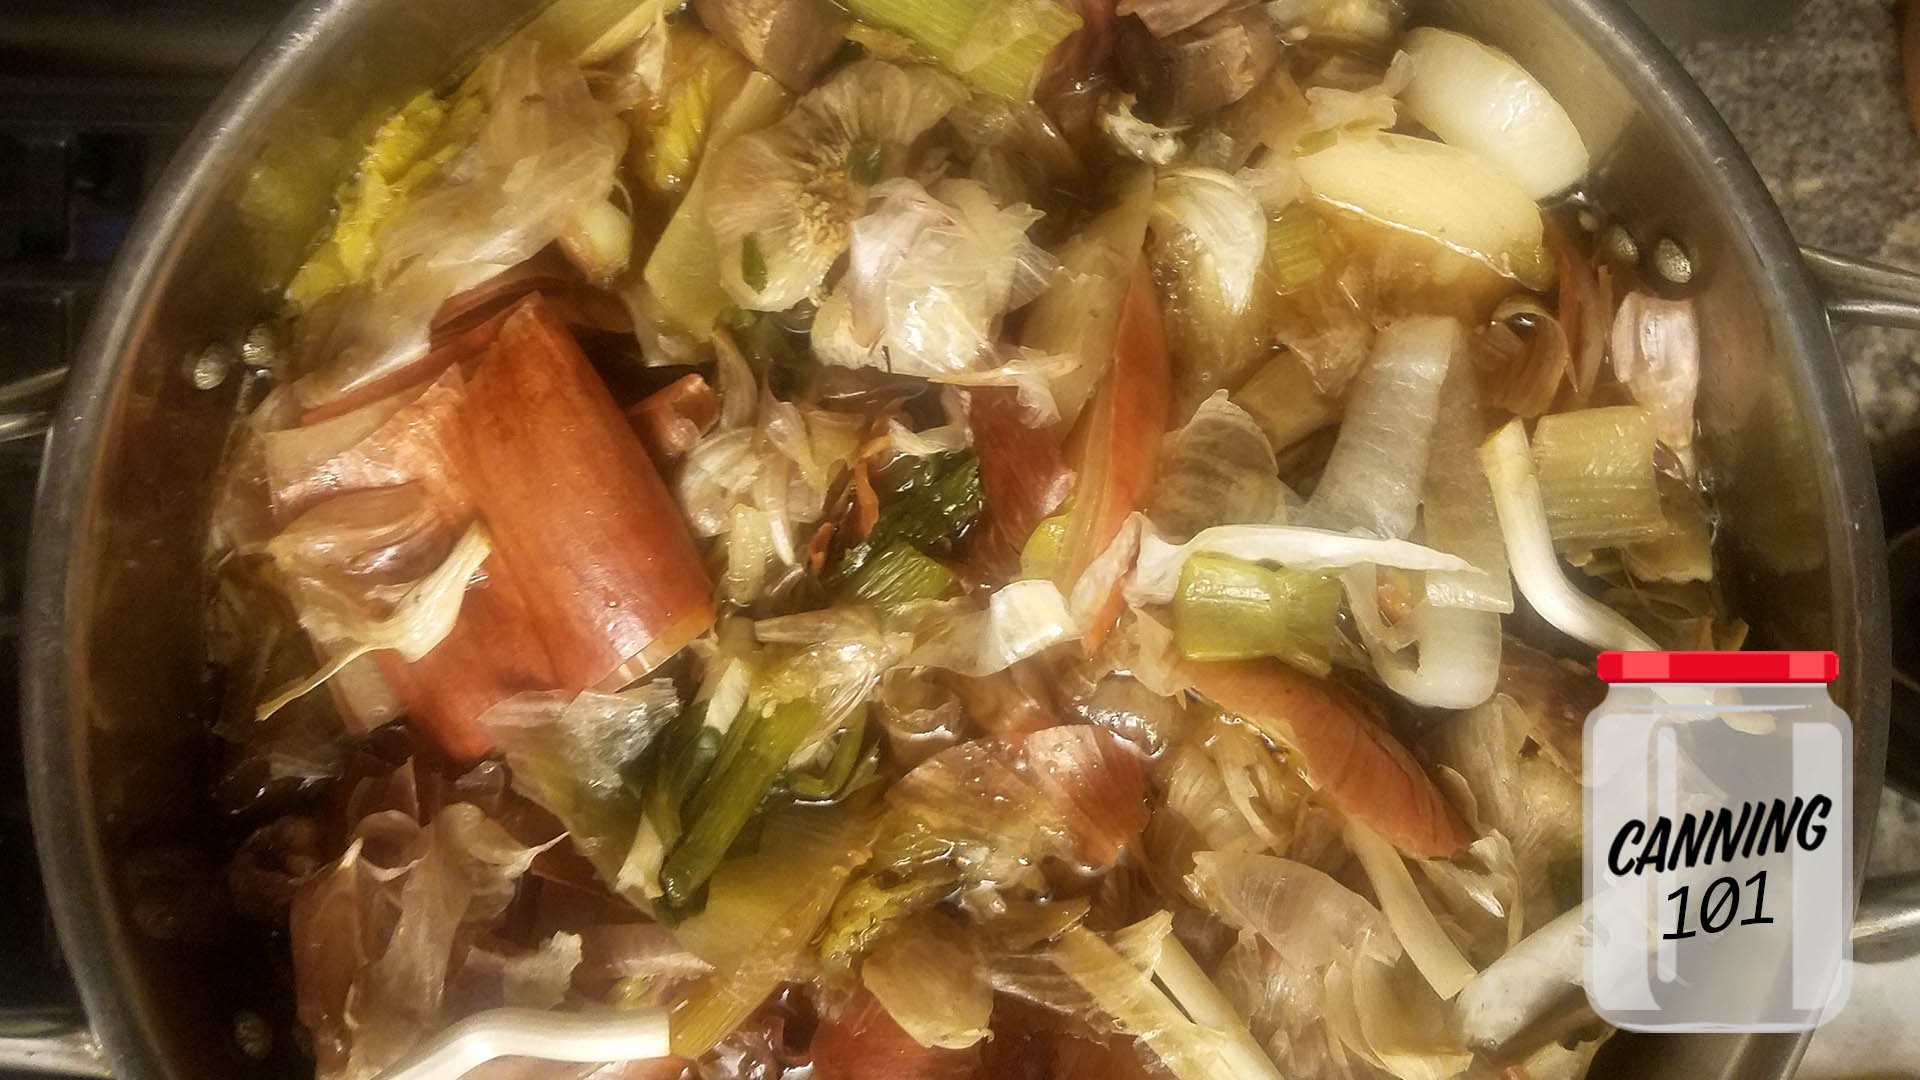
Open up our freezer and you'll usually find at least one or two large Ziploc bags filled with onion and garlic skins and ends, celery tops and feet, and mushroom stalks. There are also bones from the pork shoulders we use for sausage making, bones from cheaper bone-in chicken cuts, and bones from beef. If we get ahold of bones and scraps from the family Christmas dinner prime rib we make beef stock, and if we end up with a turkey carcass after Thanksgiving, it's easy to guess what we do with that.
We started collecting the scraps and castoffs mainly as a way to reduce kitchen waste, but it's also so freaking cheap! Commercial stock is expensive, the containers are often not recyclable, and sometimes they add weird stuff like yeast extract and "natural flavors." When you make your own, you know exactly what is going in there. Making stock allows you to make everything more flavorful (you can use it instead of water when making rice or couscous) and reduce the amount of food waste you produce. Canned stock, if properly sealed and stored, stays good for at least a year.
It may surprise you to see how quickly those gallon bags of scraps fill up, especially if you are cooking more from scratch now than you did before. In our house, once there are more plastic bags filled with so-called trash in the freezer than actual food, we settle down to the business of making stock. One man's trash is another man's treasure.

Fortunately for me, stock-making is a lazy person's business, really. It mostly just requires time to boil away in a big pot on the stove, steaming up your windows and enveloping the house in comforting aromatics. I love the process of making stock because it's not like the other things we can. It's not the messy and often loud tomato sauce canning process, it's not the sharp vinegar tang in the nostrils and watery eyes brought on by the pickles we can all summer—if it's a good year. It's just a mellow warm vibe that's almost soup, but not quite. The biggest expenditure of labor is washing the jars. You must do some individual education on the basics of canning to do it safely, but after that's done the opportunities that have now opened up for preserving foods are almost limitless.
The greatest thing about stock is that you are quite literally making something from what could be considered trash or refuse. It feels so elegant, even though it is simply boiling scraps. My favorite fake-out.

Basic Stock
Requirements:
- A pressure canner
- Canning jars and lids
- Large stock pot
- A bag of collected veggie scraps
- Bones, meat, or animal carcasses (for meat stocks)
- Water (filtered is best)
- Herbs if desired
- Salt if desired
A general note on canning: There are two types of canning, water bath canning and pressure canning. Water bath canning is used more for foods high in acid: jellies, jams, tomato sauces, pickles. Pressure canning is used for low-acid foods: most vegetables, meats, poultry, and seafood, or combination recipes like soups and stews.
Canning is fairly simple and safe; people have been at it for a long time. However, it does require a level of caution, research, and attention. There is a risk of danger or injury when you use a pressure canner, so please read the manual of your canner, and acquaint yourself with the Basics of Home Preservation guidelines from the USDA before canning for the first time.
Fill a large stock pot with water. Add your bag of collected vegetable scraps. Bring to a boil, reduce the heat. Cover and simmer for two hours. Uncover and continue to cook for two additional hours. Stir it now and then. Stock can be simmered for a longer period of time if you want a stronger, more concentrated version. Skim and discard the vegetable scraps, then strain the broth through cheesecloth to catch any remaining solids.
Ladle the hot stock into hot, clean jars leaving one inch of headspace. Wipe the top of the jar with a damp, clean paper towel and place a clean lid on top, tightening the band to just finger tight. Process in a pressure canner at 10 pounds pressure for 30 minutes for pints and 35 minutes for quarts. After the canner has depressurized, remove the jars and set them on a clean towel on a table or countertop where they won't be disturbed for 24 hours. Leave about 2 inches of space between the jars. If any jars do not seal within an hour (you'll hear a pop-ping when they do and when you run your finger over the top of the jar the center should be depressed and you should not be able to push the center in) refrigerate them immediately and either use or freeze within a few days. You can also reprocess the unsealed jars within 24 hours if you choose to. Placing the stock in freezer-proof containers/bags and freezing is always an option if you have the space.
If you are using meat or bones, you may want to cool the stock enough to skim the fat before canning, or use a fat separator. It's also important to confirm the pressure and times for the type of stock you are making. The Ball Blue Book Guide to Preserving is a great resource.