11 Mistakes To Avoid When Cooking Chicken In The Air Fryer
We may receive a commission on purchases made from links.
If you're lucky enough to own an air fryer, you probably know how useful the device can be, especially when it comes to cooking chicken. There's no clunky ovens or hot kitchens to deal with –- just a simple push of a button stands in the way between you and a delicious chicken meal. With that said, though, there are many mistakes people often make when it comes to air frying chicken, and we think it is about time we expose them. Neglecting key ingredients, forgetting to use the correct tools, and skipping steps that could ultimately save you time are among the many errors air fryer enthusiasts often make.
Eager to learn more? Join us as we not only uncover these common mistakes, but also offer tips and tricks to get you that much closer to crispy, crunchy air-fried chicken deliciousness. Much of the advice offered here is based on extensive personal experience along with research into trusted sources to bring you tried-and-true air-frying methods that work. So, without further ado, let's dive into the common mistakes people make when air frying chicken.
Omitting oil
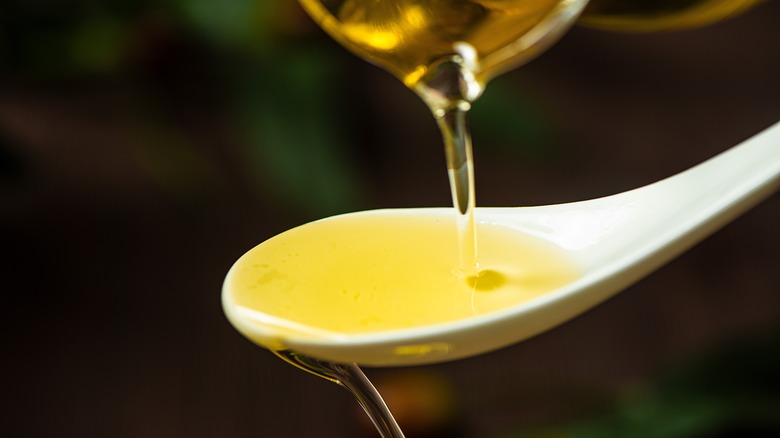
While you won't always need to use oil when making chicken in an air fryer, doing so is almost always a great idea. Not only does the oil help seasonings adhere to the chicken better, but it also encourages crisping of the skin while delivering a delectable brown hue.
There are several ways you can add oil to your chicken. The first is to toss your chicken into a bowl before drizzling it with the oil of your choice. The second option is to place the chicken directly into the air fryer basket before using a basting brush to evenly oil the chicken's exterior. Lastly, (and our personal favorite) is to give it a spritz of cooking oil. We love loading an oil sprayer with olive oil before gently misting each chicken piece. This not only eliminates mess but also cuts down on the amount of oil you use. Once your chicken pieces are oiled, add your seasonings and cook as you normally would. If you still want to omit the oil when cooking air fryer chicken for health or dietary reasons, we'd recommend using juicer chicken pieces, such as bone-in chicken thighs — roasting this type of chicken in an air fryer often yields crispy results, even without the use of oil.
Being afraid to air fry frozen chicken

Air frying frozen chicken requires a few extra steps, but it's totally doable, provided you don't mind babysitting your chicken a bit. When air frying frozen chicken, thaw the chicken slightly before adding your seasonings. To do this, stick your frozen chicken pieces in the air fryer for around 10 minutes or more (depending on size) at 400 F or until most of the ice has melted off of the chicken. Remove the air fryer basket, and coat your thawed chicken lightly in oil. Dump any liquid that has accumulated at the bottom of the basket into the sink or trash — leaving it in the basket will steam your chicken rather than cook it, which can prevent your chicken from developing color and crispiness. Season your chicken as normal on both sides and continue to cook the chicken just as you normally would.
At the end of the cooking time, check your chicken for doneness, preferably using a meat thermometer (more on that later). If you think your chicken could use more time in the air fryer, be sure to remove any excess liquid from the bottom of your fryer basket as you did previously before returning the chicken to the air fryer to continue cooking. Remember that cook times and temperature will largely depend on the size of your chicken, so be sure to adjust each accordingly to avoid over- or under-cooking your air fryer chicken.
Forgetting that other foods can be added to the basket
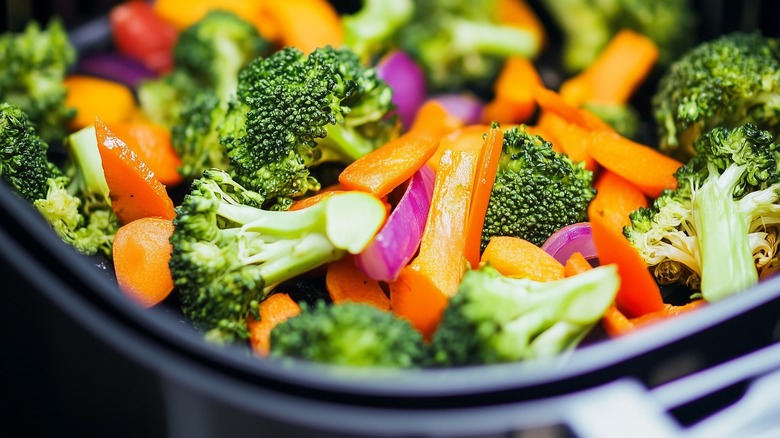
Sometimes, it's easy to get stuck in a rut and forget that there are other ways to get a variety of tasks done; the same is true when cooking chicken in an air fryer. Rather than frying up chicken in isolation, why not throw in a few veggies to cook at the same time?
To pull this off, you'll need to consider the type of vegetables and chicken pieces you are using, as they may require different temperatures and cook times. Air fryer chicken breasts, for example, may take up to 16 minutes or more at 375 F in certain air fryer models. If you want to roast potatoes along with the chicken, dice them up and add them to the basket before the chicken. Since diced potatoes generally take around 20 to 30 minutes at 375 F to cook, you'll want to give them a head start. As time goes on, test both your chicken and potatoes for doneness, making sure to remove whichever cooks the fastest first. Apply the same approach to other veggies or food items you'd like to cook alongside your air fryer chicken. And though there are many variables to consider when cooking chicken in an air fryer with vegetables, once you get the hang of it, it'll save you time and even prevent you from having to deal with extra dishes.
Not using a meat thermometer

We've already touched on the usefulness of a meat thermometer when air frying chicken, but now it's time to delve a little deeper into why this gadget is so essential. Not using a meat thermometer to check the doneness of air-fried chicken could lead to unsavory outcomes, especially concerning your health. Consuming undercooked chicken puts you and others at risk of contracting a food-borne illness, meaning that making sure your chicken is thoroughly cooked should be top priority.
To use a meat thermometer when cooking air-fried chicken, simply insert your thermometer directly into the cooked meat. When doing so, be careful not to place your meat thermometer near the bone, as bones are conductors of heat and may not give an accurate representation of the temperature of the rest of the meat. Instead, aim to insert your thermometer into the thickest part of the chicken while also avoiding fatty pockets. Leave your thermometer there until you get a steady reading before removing it. According to the USDA, poultry should generally be cooked to about 165 F or higher, so make sure you get a reading that's around this temperature before digging in. Digital meat thermometers are the easiest, in our opinion, but a standard meat thermometer will work just as well.
Forgetting to adjust temperature and timing methods
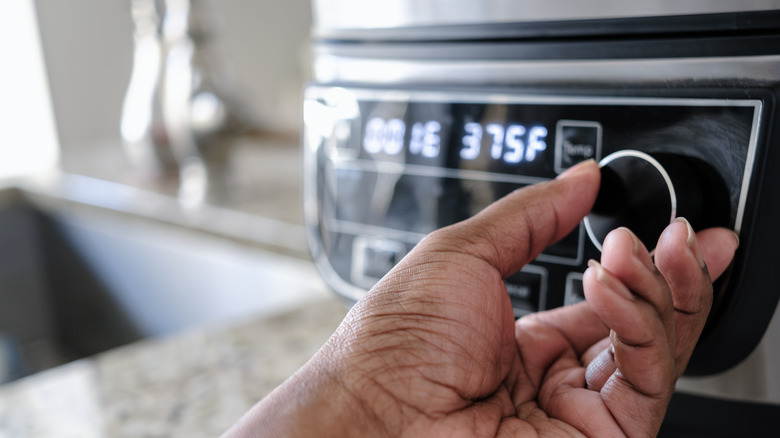
Though an air fryer has many similarities to a conventional oven, the amount of time the device takes to cook chicken can vary. Because of this, some people make the mistake of cooking their chicken in an air fryer for the same time and at the same temperature they would in the oven, often with less-than-stellar results.
In general, when converting oven cook times to air fryer times, the best thing to do is to reduce the normal oven cooking temperature by 25 degrees while simultaneously cutting the cook time by about 20%. This means that chicken that normally cooks in the oven at 375 F for 40 minutes might cook at 350 F for 32 minutes in an air fryer. Please note that these "rules" are not set in stone, meaning they may not work in every instance — feel free to adjust according to your needs.
Lastly, though steady cooking temperatures often work well for when preparing air-fried chicken, you shouldn't be afraid to veer from them to get your desired results. If you like a crispier finish on your chicken skin, for example, don't be afraid to crank the heat for the last five to 15 minutes to give it extra crunch. Just be sure to keep an eye on it — chicken can go from crunchy to burnt in a matter of minutes, so be aware of that before you turn up the heat.
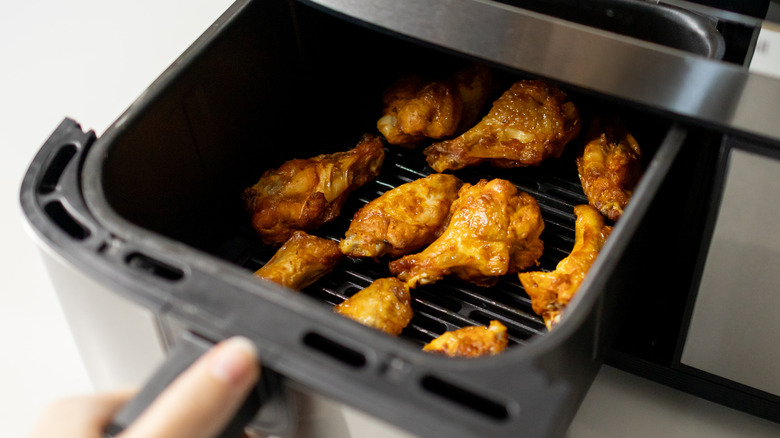
Not taking advantage of the shake setting
We realize that not all air fryers have a "shake" setting, but even if yours doesn't, the upcoming principle still applies. We can remember our first time cooking bone-in chicken thighs in an air fryer and how surprised we were at the juicy, crisp, and delicious results. That wasn't by accident — flipping the chicken halfway through does wonders for achieving crunchy deliciousness at every angle while ensuring even cooking and juiciness throughout. We tested this by neglecting to flip our chicken and found the results not nearly as satisfying — the top was overdone, while the bottom remained soggy and rubbery.
So, where does the "shake" button come into play in all of this? The shake button will alert you halfway through cooking time that your chicken (or whatever you are air frying) is done. Our air fryer, the COSORI Air Fryer Pro 9-in-1, gives a few beeps at the halfway point, though every air fryer is different. Don't own an air fryer with a shake button? No worries. Set your own timer to go off in the middle of cooking. Trust us, flipping your chicken is worth the extra step, resulting in juicy and evenly cooked chicken we're certain you'll love.
Limiting yourself to air-fried chicken pieces
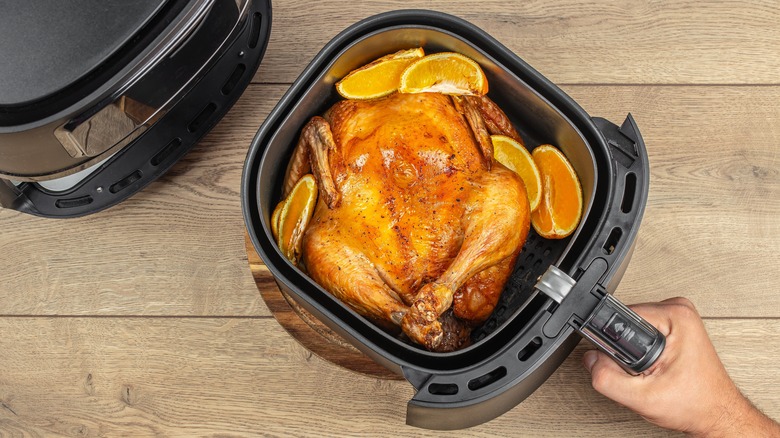
Another mistake people commonly make when cooking chicken in an air fryer is deferring only to chicken pieces rather than cooking the whole bird. If you're wondering whether or not a whole chicken will actually fit into your air fryer the answer is that it usually does, though you will need to take your air fryer basket and chicken size into consideration ahead of time. In general, a chicken up to 3.75 pounds should fit comfortably into a 5.8 quart air fryer basket. For a smaller-sized basket, you'll need to pick a smaller bird.
To prep a whole chicken for air frying, first ensure its cavity is empty and the skin on the chicken is dry. Drizzle (or spritz) your chicken with oil before adding your desired seasonings. You could even try coating your roast chicken with lemon curd pie filling if you're up for it.
Set the chicken in your air fryer basket, ensuring that the meat isn't touching the heating element at the top of your air fryer. If you need to, gently push down on the top of the chicken to make it flatter. Once your chicken is ready, set your air fryer to 350 F (no need to preheat) and cook for 30 minutes before flipping it and cooking for another 30 minutes. Check the internal temperature for doneness, around 165 F. Finally, allow the chicken to rest (usually about five to 10 minutes will do) before slicing in. Delish!
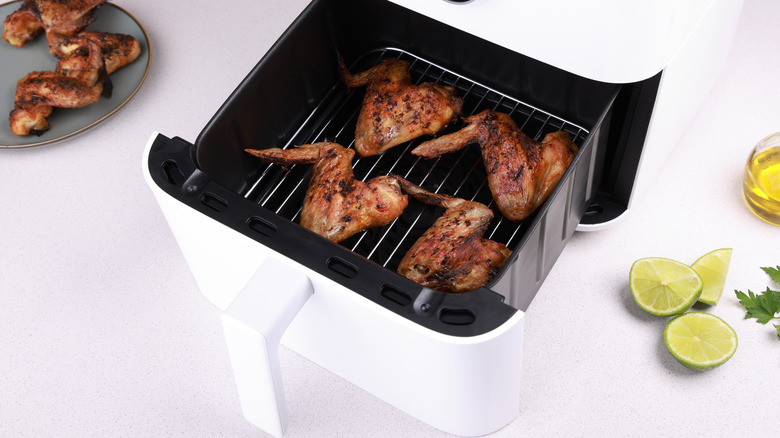
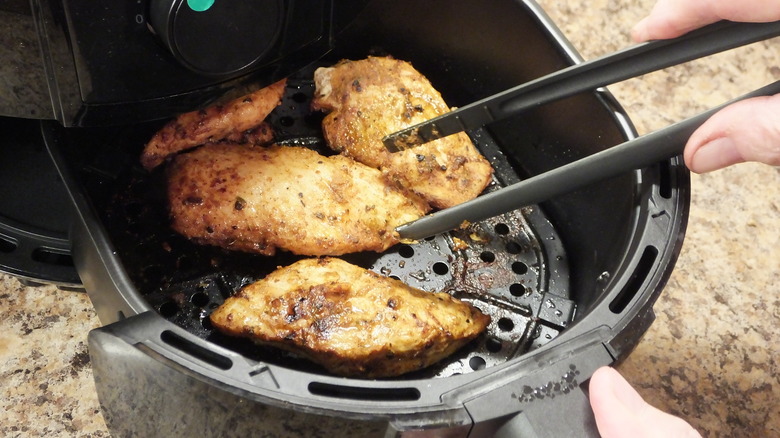
Allowing your chicken to overlap
Out of the many basic rules for using your air fryer to the fullest, arranging chicken pieces so they aren't touching each other is one of the best. By allowing plenty of space between your chicken, you open the door to crispy and perfectly cooked air-fried results every time. The reason for this comes down to airflow — when you cram chicken pieces into your air fryer without leaving room between them, you stifle air movement, which affects how the chicken cooks. And though it's possible to air fry chicken pieces that are stacked on top of one another and still (eventually) achieve the correct internal temperature, it can be much harder, especially if the chicken pieces are large and thick.
Yes, this means you'll have to cook in batches, and yes, the cooking process as a whole will take longer. Even so, by arranging chicken pieces so that there is at least 1 inch of space between them, you'll be that much closer to enjoying delightfully crisp and golden brown air-fried chicken that's totally worth the extra effort.
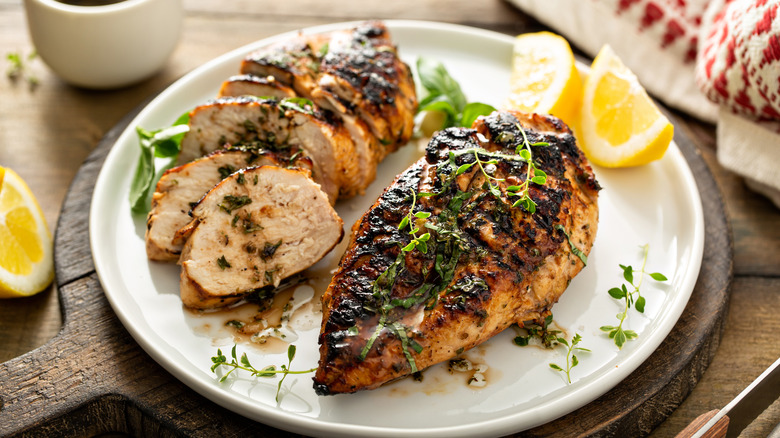
Forgetting to marinate the chicken before air frying
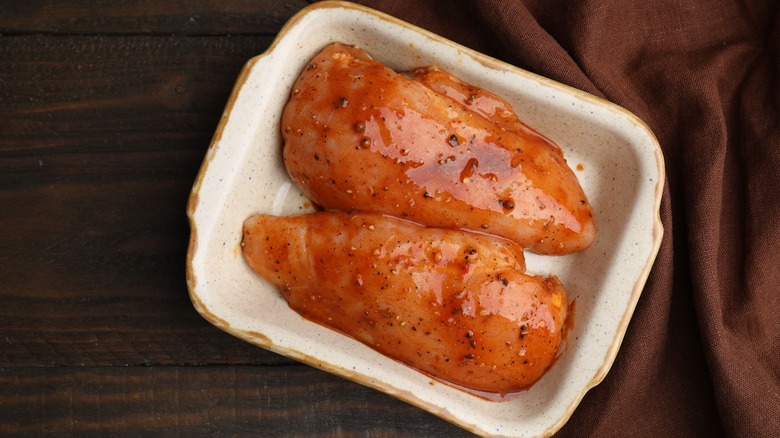
Marinating your chicken before air frying is yet another step in your cooking routine that can often prove a worthwhile venture. Marinating the meat ahead of time can yield amazing results, not only imparting flavor but making for tenderer and juicier chicken, as well.
There are several ways you can marinate your chicken, though you'll want to use certain ingredients when doing so. While there are no hard and fast rules to exactly what to put in a marinade, similar to the ingredients needed to marinate steak, you'll typically want to use an acid (think vinegar or lemon juice) along with oil and your choice of seasonings. You are also welcome to add a little sugar, as this can help with browning.
Also, if you'd like to emulate the tantalizing flavor and texture of a deep-fried chicken using an air fryer, try marinating your chicken in buttermilk first. The buttermilk works as an acid to tenderize your meat and can also help your seasonings and flour adhere better. Simply soak your chicken pieces in buttermilk before dredging them in flour and placing in your air fryer for tasty and satisfying results. No buttermilk on hand? Try whipping up your own version of buttermilk at home as an easy alternative.
Overcooking boneless chicken breasts
If you've ever sampled an overcooked chicken breast, you know how awful they can be. Tough, leathery, and hard to chew, they hardly constitute a good meal. One of the most common mistakes people make when cooking chicken breasts in an air fryer is cooking them too long. One way to avoid this mistake and thereby redeem what could arguably be meat's biggest snooze, we are once again recommending that you use a meat thermometer to ensure that your chicken registers at least 165 F before you chow down. Some people find their chicken breasts to be even juicier when pulled out a little ahead of time, such as at 160 F; the meat will often continue "cooking" as it rests and will reach 165 F or higher by the time you're ready to eat.
In addition to using a meat thermometer, you'll also want to take note of the size of your chicken breasts. If they are on the smaller size (5 to 7 ounces), you'll only want to fry them for seven to 10 minutes, making sure to flip them halfway through for even cooking. Larger chicken breasts will take even more time, with some of the largest (11 ounces and up) requiring 12 to 16 minutes or more. Don't forget a brine and/or marinade — both of these are amazing methods that can help promote juiciness in an otherwise dry air-fried chicken breast.
Forgetting about air fryer liners for easy cleanup

Using a liner when air frying chicken is completely optional, but if you're someone looking to lessen mess and stress in your kitchen, using a liner when air frying could prove to be a game changer. There are different liners available on the market, including the disposable sort, like these Baker's Signature Store Air Fryer Paper Liners, and permanent liners. When selecting an air fryer liner, keep in mind the size of your air fryer basket, as some liners may be too big or small for your air fryer model. Also, keep in mind that some liners, especially those that are reusable, can get very hot at times, so be sure to remove them with a pot holder instead of your bare hands.
Once you're done using your air fryer liner, either toss it into the trash or, if you're using reusable liners, into the sink or dishwasher for a quick wash. No matter which you choose, using a liner beats having to scrub your air fryer basket, thus making the purchase of this optional air fryer accessory worth it.