How To Get The Perfect Pie Crust Crimp
Bringing a homemade pie is appropriate for almost any celebration, whether it's Thanksgiving, Christmas, or a birthday. Not only are the pie filling options endless, but this dessert can look impressive and beautiful with a few extra touches –- not the least of which is your crispy pie crust. Making a flaky, buttery pie crust from scratch is rewarding but also challenging at times, crimping included. You might just be winging your crimping method, but there are a few easy methods to follow which look way more impressive than they actually are. Starting from the simplest: the finger crimp.
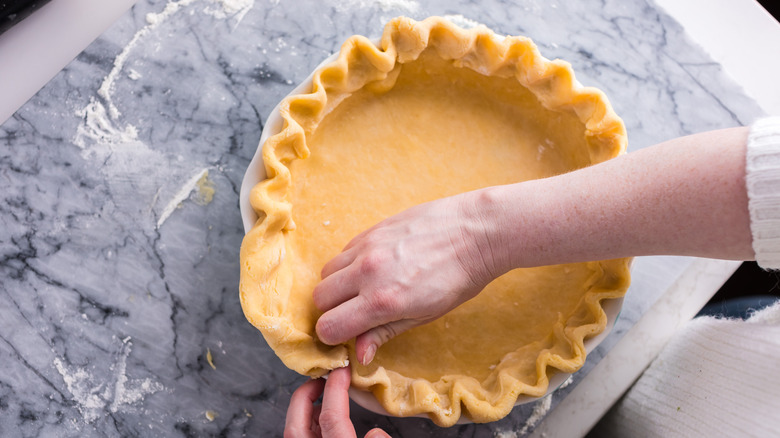
You'll want to start by rolling out your cold dough to be around an inch or so bigger than the circumference of your pie pan. This will give you enough dough to crimp and also allow for baking shrinkage. Once you've pressed your dough into the pan, fold the overhang excess underneath itself so that the crust is in line with the rim of the pan. Now you're up to the fun part –- finger crimping. With floured hands, pinch the outside edge using two fingers while pushing the dough outwards with one finger in between the crimp you just created. Keep doing this until you complete the circle, turning the plate as you go. Pro tip: You can control the size of the crimps based on how far apart your two pinching fingers are.
A few other pie crimping methods
If you feel like you've mastered the classic finger crimp, the next crimping method has a unique twist. Once again, fold over the excess underneath itself before pinching the dough outwards with your thumb and twisting it slightly inwards with your index finger. Work your way around, making sure that you're pinching the dough fully to the edge of the pan.
The last and most impressive looking technique will make you look like a pie making pro. This method will require a little extra dough which you will slice into three ¼-inch strips. Pinch one end together and start folding over the strands from the outside to the center, making a classic three strand braid. Once finished, pinch the other end closed as well. You may need two or three braids to complete the pie edge. Brush the crust with water before placing the braids onto the edge and connecting each braid onto each other. You can then cut any excess overhang right up until the braided edge.
Whichever crimping method you follow, make sure your dough is cold during the whole process. You should also chill the dough for at least an hour before baking it. This will ensure that the shapes and hard work won't melt away (literally) in the oven.

