13 Cheese Grater Mistakes You Need To Stop Making
We may receive a commission on purchases made from links.
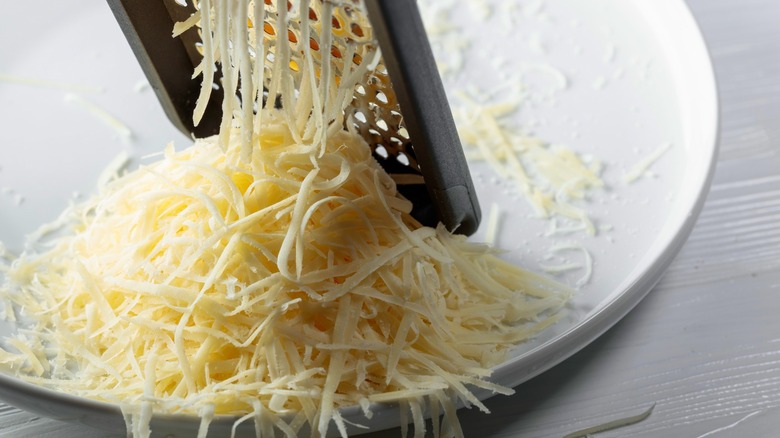
Using a cheese grater sounds simple enough. After all, it's not rocket science. Grab the grater and a block of cheese and get to work, right? Well, it turns out shredding cheese is more nuanced than that, and many people are making mistakes along the way.
If you've ever cut a finger or ripped a nail while grating, something obviously went awry. Luckily, most mishaps aren't so dramatic and generally just end in less-than-desirable cheese. Think cheese that's shredded far too coarse or fine or that ends up in a mushy pile. Or perhaps, you're fighting to get that cheese through the grater in the first place.
Truthfully, most offenders aren't aware they're making cheese grater mistakes. So if you're wondering if you're among them, read on — and don't beat yourself up too much. We're here to help sharpen those grating skills by detailing common mistakes. Hopefully, you can swiftly correct course because, hey, cheddar now than never.
Only using a box grater vertically

There's some debate in the cheese world about how to use a box grater. The majority of us stand it vertically and let the cheese pile up inside, while others have discovered that laying the box grater on its side is more effective. We're not here to tell you one way is wrong, but if you've never tried the horizontal method, you're missing out.
Laying the box grater on its side allows the cheese to collect neatly inside the grater. Simply rest the grater horizontally, hold the handle firmly, and shred cheese side to side. When ready, lift the grater and pour the cheese directly into your meal or serving tray. This method comes in handy if you're making a large meal like lasagna since it eliminates the need to dirty an intermediary dish. It also ensures there are no cheese slivers left behind.
The horizontal method does come with a couple of caveats. You'll want to rest your box grater on a durable material. Since it has metal grates on all sides, it could easily scratch softer surfaces and leave marks on plates. We suggest using a wooden cutting board because not only can it handle the metal, but it's sturdy. The side-to-side method requires a bit more strength and a stable surface offsets that pressure.
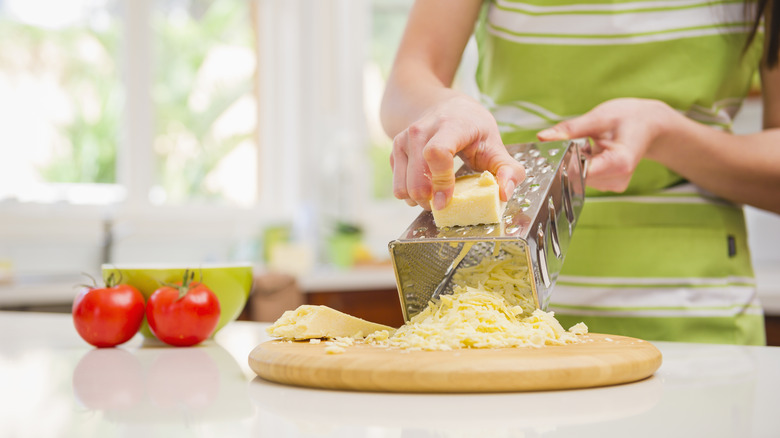
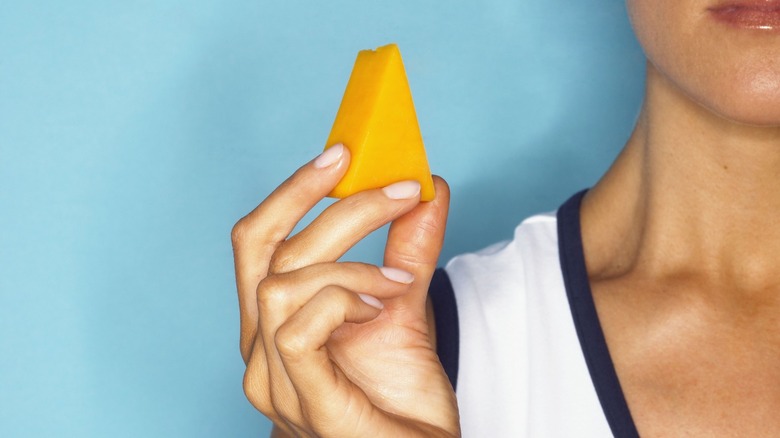
Holding cheese with your fingers, not your palm

It's human nature to grab things with our fingers. After all, we have opposable thumbs for a reason. But when it comes to shredding cheese, the palm is often underutilized.
To shred cheese, rest the cheese block in your palm, wrap your fingers around it, and guide it across the grater. When the block becomes shorter, lift your fingers and push it primarily with your palm. This will prevent you from cutting your fingers and enable you to use the entire block. Plus, we have more strength when pushing versus pulling, and it's far easier to put weight into your palms.
The palm-forward method protects those precious fingers and knuckles. Oftentimes, we let the grater come far too close to our fingers — anyone who's sliced through their skin is well aware of this. It also feels uncomfortable to rely too heavily on fingers alone. There are very minimal muscles in your fingers, so while they help stabilize the cheese, the power's in the palm.
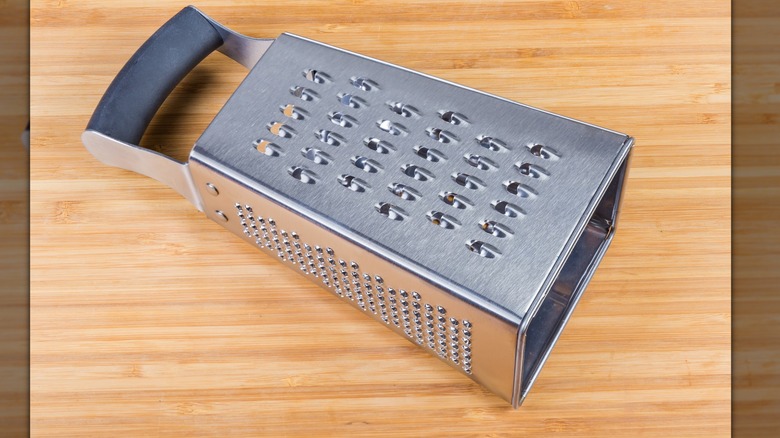
Not using the right grater

When you think of cheese graters, the first thing that comes to mind is probably a box or hand grater. However, there's a whole array of graters out there, each with its own function. You may be using the wrong one for your desired shred, so let's dive into the benefits of each type.
A box grater comes with four, different-sized grating edges, offering versatility. It's stable but takes up more space in your cupboard. Meanwhile, a hand grater is a one-sided paddle with a handle. It's compact, but only offers one grating edge, typically a course cut. A rasp-style grater has extremely small slivered grates and works similarly to a zester. This style is ideal for hard cheese like Parmesan and you can expect an extra fine, curled shred. You also have a mandoline, which isn't quite a grater, but it's often lumped into the same category. These have sharp blades that slice food items into flat pieces. It's great for getting a thin, precise cut without a knife.
Meanwhile, a rotary grater has a different design altogether. Cheese is placed inside a wheel and as you crank the lever, it pushes against the drum, forcing cheese out of the bottom compartment. It's hygienic and gives off a professional vibe, which is why it's used at Italian eateries. We're sure you've experienced Olive Garden's cheese grater, and if you want to offer that restaurant experience at home, you can purchase a similar one online.
Using the wrong side of a box grater
If you've got a box grater, you've got options. But since they come with four different sides, let's hope you're not using the wrong one. Many inexperienced cooks stick to one side and ignore the other three. Well, we've got answers.
Two sides of the box grater come with thicker holes; one for a fine shred, the other for a course shred. The coarser shred is ideal for semi-hard cheese like cheddar. It's what you might use to sprinkle over chili cheese fries or on a top-notch grilled cheese. The finer shred is for when you want the cheese to melt faster or blend into the dish, like in pasta. The third side has ultra-thin holes and thus, produces an extra fine grate, almost like a cheese duster. This works well when you want just a light sprinkle to garnish a dish.
Lastly, the fourth side comes with a horizontal slicer similar to a mandolin. This is perfect if you want thin, uniform slivers. Plus, it's much easier to use than a knife and less risky, and it's fantastic for making a layered grilled cheese.
Trying to grate crumbly cheese
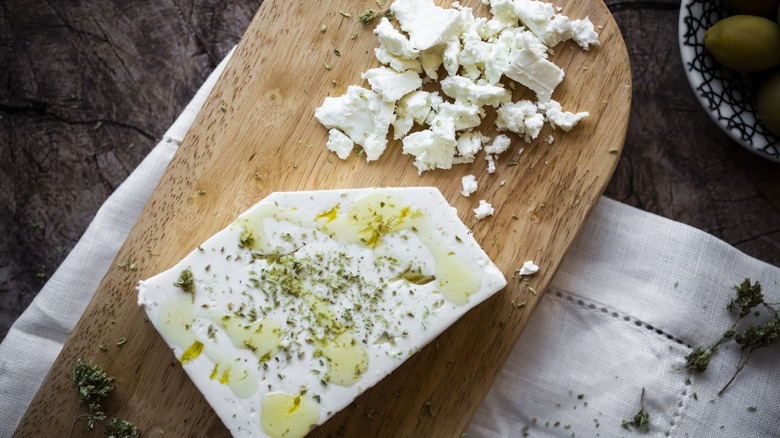
When we stroll down the dairy aisle of the grocery store, we love seeing cheese options. Each cheese has it's own flavor profile and consistency, which work beautifully in different dishes. However, not all of these cheeses are meant to be shredded. Crumbly cheese in particular just doesn't work well with a grater. As you force these cheeses against the blades, they'll break apart in your hand or get smashed into the metal.
Crumbly cheeses include feta, queso fresco, and several varieties of blue cheese. These cheeses are simply un-shreddable, so you can forget about creating thin slivers. However, if you want to grind these into smaller pieces, we've got an idea: Use a food processor, instead. With your food processor on, cut your block into smaller chunks and feed it into the tubes. Or, toss it into the food processor bowl and use the pulse setting. Either way, you'll end up with pebbled cheese (and in a fraction of the time as it would take to use a hand grater.
Grating cheese that is too soft or hard
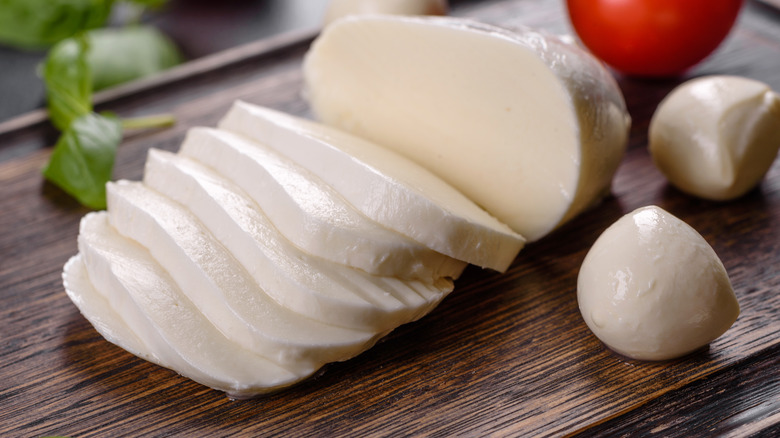
Grating cheese requires a texture that's just right. If it's too soft, it will cave under the pressure, and if it's too hard, you'll have a difficult time forcing it through the blades. You need a medium consistency to provide an ideal resistance against the metal. Luckily, there are some workarounds if this isn't the case.
Shredded mozzarella makes a delicious addition to pizza or pasta. However, it's often too delicate to grate, particularly varieties like burrata. So if you're dealing with these soft cheeses, pop them into the freezer to achieve a firmer texture. You don't want it frozen, so 15 minutes should be enough. You can also put the grater in the freezer along with the cheese. This will ensure your cheese doesn't adjust to room temperature too quickly, keeping that firm consistency longer.
Harder cheeses will put up quite the fight with your grater. Think Parmigiano Reggiano, Parmesan, or sharp cheddar. The trick here is to add moisture to soften them. One way to do this is by wrapping the cheese in a damp cloth and placing it in your fridge for roughly an hour. If you need a large amount of hard cheese shredded, break it into smaller blocks before wrapping it in cloth so it can absorb moisture evenly.
Not grating the cheese stub
We've all been there. You're shredding cheese, working your way down the block when you inevitably reach the stub. It feels a bit too precarious to keep going, so like most of us risk-averse individuals, you pop it in your mouth. We can't blame you, and hey, many would consider it a chef's tax. However, for those of us who want to grate every last inch of cheese, we have some clever hacks.
One frustrated cook turned to Reddit, lamenting, "Every time I get to the end of the block it just clumps, how can I fix this? It's just bugging me lol. I'm mostly talking about cheddar." Several people suggested grating it super slowly by hand and pushing the last sliver through the grates with your thumb. Another user had a more advanced technique, "Pop the block in the freezer for a bit before putting it in the rotary grater. It tends to get gunked up otherwise." A food processor could be used similarly. However, we have an even more convenient idea: Stab the cheese stub with a fork and grind away.
Preventing cheese from sticking to the grater
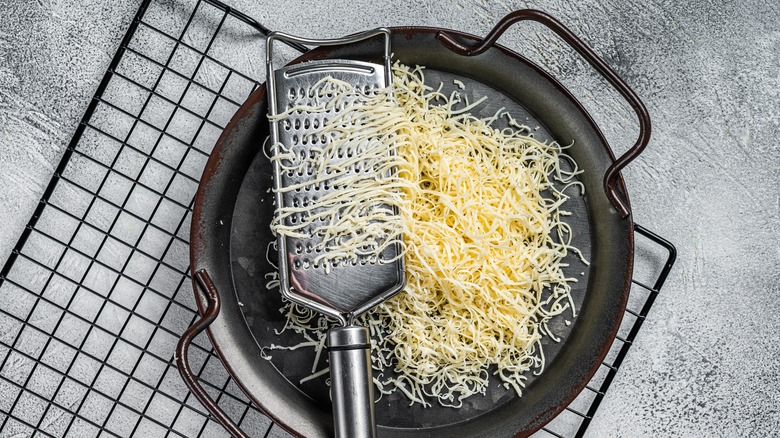
One of the most annoying issues you can face when shredding cheese is the cheese getting stuck in the grates. This may be happening because the cheese is too soft or warm. But even if the cheese is the perfect temperature and consistency, it's naturally creamy, so pieces are bound to get stuck to the metal. When they do, they prevent more cheese from flowing through smoothly, slowing down the grating process. Not only is this frustrating, but your shredded cheese can turn out clumpy and unappetizing.
A simple solution is to spray cooking oil on both sides of the grater before use. If you don't have sprayable oil, you can use a paper towel to lightly coat the metal. The slick surface will help the cheese move gracefully through the holes without getting caught. When dealing with extra soft cheese, don't forget to pop it in the freezer for 15 minutes as previously mentioned.
As you're shredding cheese, tap the grater every now and again. This will loosen any slivers trapped in the holes, which can be especially troublesome with zesters. These precautions help ensure a beautiful shred. Plus, they'll make cleanup that much easier. Without cheese wedged in the metal, washing the grater should be smooth sailing.
Washing your cheese grater in the dishwasher
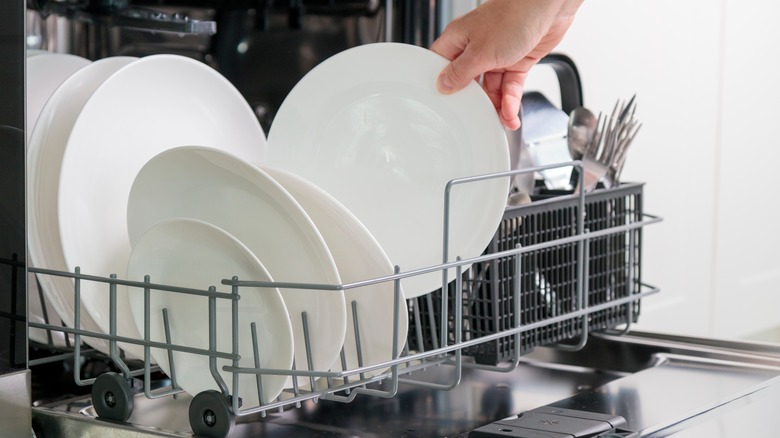
If you have a dishwasher, it can be easy to fall into the habit of throwing everything in. And if you're feeling very lazy, you might not even rinse or scrub your cookware beforehand. However, not everything should be put in a dishwasher, and that includes cheese graters. Since most graters are made of metal, the sharp holes can damage plastic dishwasher racks. Your machine will probably withstand the occasional cycle, but over time, you might start to notice the plastic wearing down.
Harsh washing can also dull the blades, which is why you shouldn't put sharp knives in the dishwasher, either. Even if you have a powerful machine, it doesn't always reach the small nooks and crannies of a cheese grater. So, how do you properly clean a cheese grater? You can use a dish brush to clean cheese stuck in the metal, and it can't hurt to let it soak for a bit beforehand, either.
Never sharpening your grater
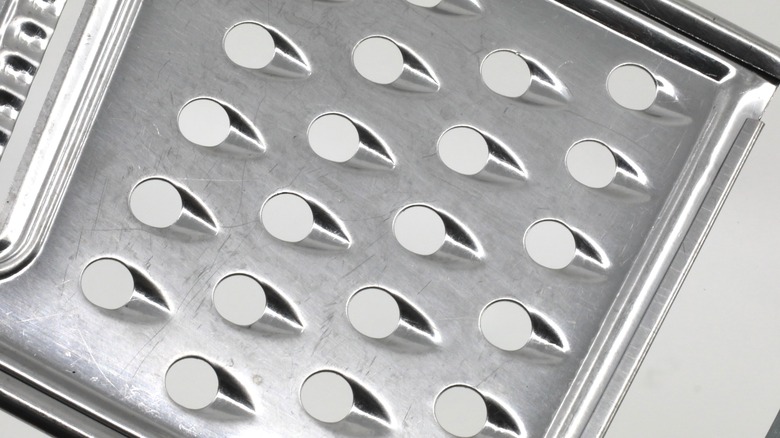
People sharpen kitchen utensils all the time and the Japanese even have a special art dedicated to knife sharpening. However, it doesn't always occur to people that they need to sharpen their cheese graters. Most are made of metal with sharp edges that slice through food. So just like knives, cheese graders need the occasional sharpening.
Take a good look at your grater, if the holes are beginning to flatten or appear dull, it's time to take action. The easiest method requires solely aluminum foil and safety gloves. Fold a piece of aluminum foil several times to create a sturdier sheet. With safety gloves, rub the aluminum foil back and forth across the blades. You may need to do this several times to achieve optimal sharpness. Once satisfied, make sure to give the cheese grater a good scrub so you don't end up with bits of aluminum in tomorrow's tacos.
If the aluminum foil method isn't enough, you might need to purchase more supplies. Sandpaper is an effective sharpening tool, but a round file and knife may produce the best results. The round file can be used to sharpen the cutting edges while a knife can carefully realign the grater's teeth.
Not protecting those precious fingers
If you've ever cut yourself on a cheese grater, you know the feeling. Just imagining the scenario makes us wince in pain, and ultimately, it's something we'd like to avoid at all costs. Obviously, nobody intentionally slices a finger on a grater — but it happens more often than you think. So if you like to err on the side of caution, we've got you covered.
Avoiding all the cheese grating mistakes on this list is a good start. But to take it a step further, use a protective glove. Not the type that will keep you cozy in the winter, but the type to create a barrier between you and those blades. The good news is you probably already have one lying around your kitchen. While fabric potholders will work in a pinch, cut-resistant gloves are the best option. However, we don't expect you to invest in these gloves solely to cut cheese. If you don't already have a pair, silicon potholders or rubber gloves can do the trick.
Always grating cheese over a plate
We get why people use plates to shred cheese. it's the perfect serving tray and eliminates the need to transfer the cheese from one surface to another. Unfortunately, plates aren't a reliable surface. They can be unstable and wobble under pressure. And if applying too much force on a handheld grader, that plate could go flying along with the shredded cheese.
Instead, we recommend using a sturdy wooden cutting board. These boards are resilient, but make sure to clean your wooden cutting board correctly so it won't harbor bacteria. Alternatively, a large piece of parchment paper will also work. Not only will both these options provide you with more workspace, but they're less likely to slip out from under you. And despite their larger size, you can still pick them up to transfer the cheese. Parchment paper is even more flexible, so you can fold the sides in half and sprinkle freshly shredded cheese right over your meal.
Using your grater exclusively for cheese

We call it a cheese grater for a reason. Freshly shredded cheese is far superior to packaged stuff, and you need a solid grater to make it. That said, there are more uses for a grater than solely cheese.
Want a fresh salad? Shred carrots, beets, and apples for a refreshing, vitamin-packed starter, or grate hard-boiled eggs for potato salad. Making a homemade sauce? Use a grater to pulverize tomatoes or mince cucumbers for tzatziki dip. Firm veggies also work exceptionally well on a grater, and you can use one to make cauliflower rice or extra crispy hash browns.
You can use a grater on a handful of frozen foods that you might not expect. Frozen chicken can be shredded before it's cooked for a satisfying texture. For something sweet, freeze a banana or mango, then shred it over ice cream or yogurt. If you prefer baking, freeze and grate butter for flakier pastries, and use a zester to add cinnamon, nutmeg, or lemon.